Continuing the drawing:
We are going to continue with the development of the application FaceIt. First we will extract some variables out (making them global) so that they can be set in the future when we start dealing with gestures. Begin by making the mouthCurvature constant inside pathForMouth() a global variable. Add in another global variable called scale of type CGFloat, and in the calculation for the skullRadius, tac on a multiplication with the scale variable.
var scale: CGFloat = 2.0
var mouthCurvature: Double = 0.0

var skullRadius: CGFloat {
	return min(bounds.size.width, bounds.size.height) / 2 * scale
}
We will also be adding functionality to make the eyes open and close, and another face feature: eyebrows. To start this off we will be adding more global variables:
var eyesOpen: Bool = true
var eyeBrowTilt: Double = 0.0
In the pathForEye() function we now need to check the condition of the eyesOpen boolean to see if we are drawing open eyes or closed eyes.
private func pathForEye(eye: Eye) -> UIBezierPath {
	...
	if eyesOpen {
		return pathForCircleCenteredAtPoint(eyeCenter, withRadius: eyeRadius)
	} else {
		// drawing horizontal line to represent closed eyes
		let path = UIBezierPath()
		path.moveToPoint(CGPoint(x: eyeCenter.x - eyeRadius, y: eyeCenter.y))
		path.addLineToPoint(CGPoint(x: eyeCenter.x + eyeRadius, y: eyeCenter.y))
		path.lineWidth = 5.0
		return path
	}
}
For the eyebrows we are going to create another helper function to draw it's path, like we have done for the other face features. This code looks a lot, but most of it is simple math for the drawing calculations.
private struct Ratios {
	...
	static let SkullRadiusToBrowOffset: CGFloat = 5
}

private func pathForBrow(eye: Eye) -> UIBezierPath {
	var tilt = eyeBrowTilt
	switch eye {
	case .Left: tilt *= -1.0
	case .Right: break
	}
	var browCenter = getEyeCenter(eye)
	browCenter.y -= skullRadius / Ratios.SkullRadiusToBrowOffset
	let eyeRadius = skullRadius / Ratios.SkullRadiusToEyeRadius
	let tiltOffset = CGFloat(max(-1, min(tilt, 1))) * eyeRadius / 2
	let browStart = CGPoint(x: browCenter.x - eyeRadius, y: browCenter.y - tiltOffset)
	let browEnd = CGPoint(x: browCenter.x + eyeRadius, y: browCenter.y + tiltOffset)
	let path = UIBezierPath()
	path.moveToPoint(browStart)
	path.addLineToPoint(browEnd)
	path.lineWidth = 5.0
	return path
}
Remember to call this helper function for each eye in drawRect and chain it with a stroke() method to draw it in the view. Now would be a good time to check if what we added is working i.e. eyes can be open/closed, and eyebrows can vary in tilt.
Finally, we will extract some more global variables for the color of the strokes and the lineWidth of the paths. You should have noticed the lineWidth has been set to 5.0 in more than one place. Remember to replace the local variables with their global counterparts in the function definitions.
	var lineWidth: CGFloat = 5.0
	var color: UIColor = UIColor.blueColor()
What is interface builder?
So here we are at the point of revealing how to get your drawing to appear in your storyboard. By now you probably feel that iOS development is a pain with the constant rerunning of your application for every small edit to the drawRect function of a view.
To get the storyboard to show you what drawRect will do, we need to add @IBDesignable to the top of the FaceView class. However, there is more we can do! We can add @IBInspectable to the global variables so that they can be modified within the attributes inspector!
import UIKit

@IBDesignable
class FaceView: UIView {

	@IBInspectable
	var scale: CGFloat = 0.90
	@IBInspectable
	var mouthCurvature: Double = 1.0 // 1 full smile, -1 full frown
	@IBInspectable
	var eyesOpen: Bool = false
	...
}
You should now be able to see your face in the storyboard. Furthermore, you should be able to modify the global variables using the attributes inspector. Any changes made will cause the storyboard to be recompiled and the changes to be visually seen, all without having to rerun your application, sweet!
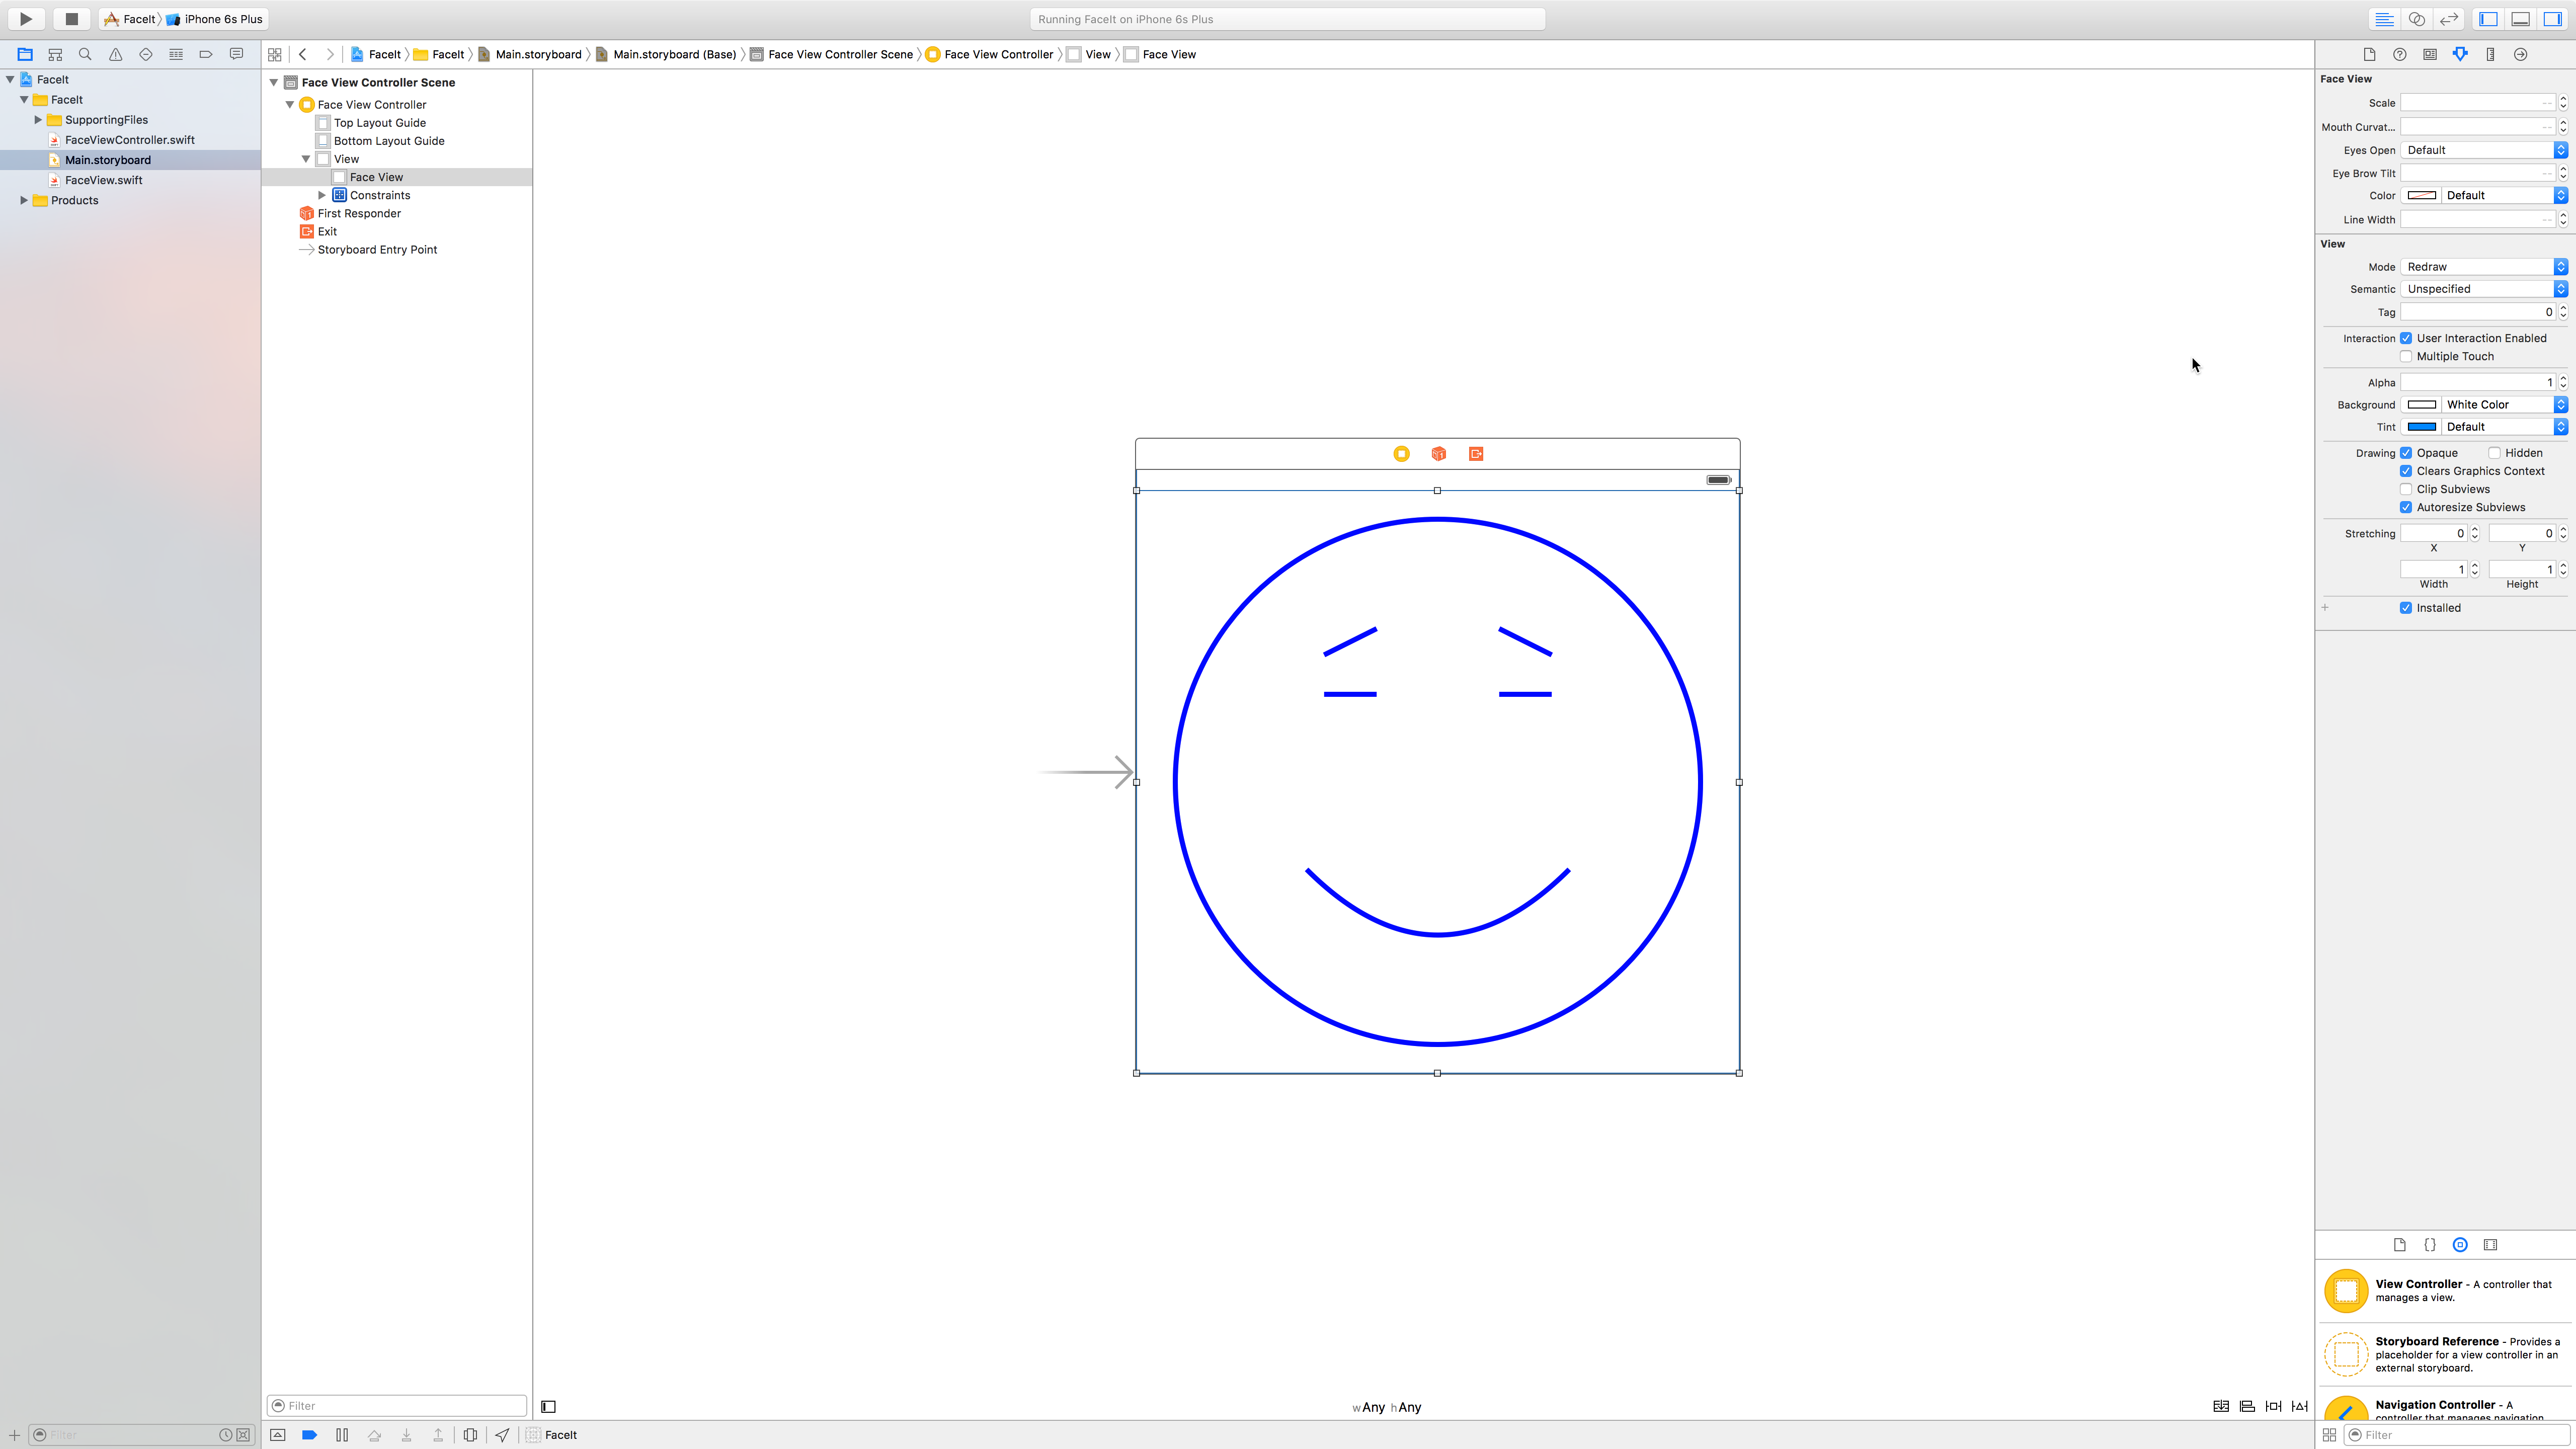 Figure 1: Getting more out of the storyboard in Xcode.
Note: With IBInspectable you need to ensure that the variables are explicitly typed. Swift can infer the types, but interface builder cannot.
Redrawing when variables change
So we have these global variables in our FaceView that when modified should cause the device to redraw the view. We will set up this link now. It's actually very little code.
@IBInspectable
var scale: CGFloat = 0.90 {
	didSet {
		setNeedsDisplay()
	}
}

// The above is quite common code, and so the carriage returns can be removed...

var scale: CGFloat = 0.90 { didSet { setNeedsDisplay() } }
The function call setNeedsDisplay() tells the system that the view needs to be redrawn, and the system will decide when it is appropriate to redraw. It's important to note that the user should never explicitly call drawRect(). The system should be able to optimise when it should redraw, think about the scenario when multiple variables change together, should the view be redrawn on each variable change or after all the variables have been changed (within a certain timeframe of course). Ensure that you add this code to all the global variables in FaceView.
Implementing the FaceViewController and its model
Let's begin by creating a model called FacialExpression. Remember the model is UI independent, and so doesn't know anything about how the FaceView is implemented. Create a new iOS Swift file and call it FacialExpression. In it include the following code:
struct FacialExpression {
	enum Eyes: Int {
		case Open
		case Closed
		case Squinting
	}

	enum EyeBrows: Int {
		case Relaxed
		case Normal
 		case Furrowed

 		func moreRelaxedBrow() -> EyeBrows {
 			return EyeBrows(rawValue: rawValue - 1) ?? .Relaxed
 		}
 		func moreFurrowedBrow() -> EyeBrows {
 			return EyeBrows(rawValue: rawValue + 1) ?? .Furrowed
 		}
	}

	enum Mouth: Int {
		case Frown
		case Smirk
		case Neutral
		case Grin
		case Smile

		func sadderMouth() -> Mouth {
			return Mouth(rawValue: rawValue - 1) ?? .Frown
		}
		func happierMouth() -> Mouth {
			return Mouth(rawValue: rawValue + 1) ?? .Smile
		}
	}

	var eyes: Eyes
	var eyeBrows: EyeBrows
	var mouth: Mouth
}
The controller therefore has to be able to connect this model to the FaceView. For example, it will need to be able to convert from the EyeBrows enum in the model to the eyeBrowTilt in the FaceView. Now let's start wiring up our controller to make these connections.
We can start by creating an instance of the model that we can refer to. Remember that FacialExpression is a struct, and so we get the default initialiser with arguments equals to the number of variables that need to be initialised in that struct.
import UIKit
class FaceViewController: UIViewController {
	var expression = FacialExpression(eyes: .Open, eyeBrows: .Normal, mouth: .Smile)
}
Realise that any changes to this variable should result in changes to the view. Therefore, we will make use of didSet, making this expression a computed property. However, one important thing to note, and you may have even questioned why we made the FacialExpression a struct?, is that expression is a struct, and so is a 'value' type. This means that didSet will be called when any of the struct's variables are changed. This is exactly what we want. If we had made FacialExpression a class, then didSet would not be called when there are changes to the variables inside the class. This is because a class is a 'reference' type, and so didSet would only be called if you were to change the reference of the variable, i.e. point it to another different instance of FacialExpression.
import UIKit
class FaceViewController: UIViewController {
	var facialexpression = FacialExpression(eyes: .Open, eyeBrows: .Normal, mouth: .Smile) {
		didSet {
			updateUI()
		}
	}

	@IBOutlet weak var faceView: FaceView!

	private func updateUI() {

	}
}
So the didSet will call updateUI(), a function that we need to write that will link the controller to the FaceView, and make the necessary changes. How do we get access to the FaceView? Remember we need to create an outlet in our controller to do this.
Now let's implement the updateUI() method. We can start off with the easiest face feature, which are the eyes. We can switch on the facilExpression's eyes enum, and cover the two cases. For each case we will be modifiying the faceView's eyesOpen boolean variable. This leads to the simple code shown below. Remember to cover all the cases of an enum in a switch statement. The squinting case an be set to closed eyes for now, as we are yet to implement squinting eyes in the FaceView.
privte func updateUI() {
	switch facialExpression.eyes {
	case .Open: faceView.eyesOpen = true
	case .Closed: faceView.eyesOpen = false
	case .Squinting: faceView.eyesOpen = false
	}
}
The mouth curvature is slightly more tricky. Instead of switching on the cases of the mouth enum in the model, it may be wise to have a dictionary that will have associated values for the different cases. A couple of things to note in the code below. Firstly, in the dictionary we do not have to repeat FacialExpression.Mouth for each case of the enum, this is because of inferred typing in Swift from the first key-value pair in the dictionary. Secondly, when indexing into this dictionary in the updateUI() method, remember that we are returned an optional value (what if we cannot find a value given a key). We can cover this using ??, which provides a default value of 0.0, if no value can be found.
private var mouthCurvatures = [
	FacialExpression.Mouth.Frown: -1.0,
	.Smirk: -0.5,
	.Neutral: 0.0,
	.Grin: 0.5,
	.Smile: 1.0
]

private func updateUI() {
	...
	faceView.mouthCurvature = mouthCurvatures[facialExpression.mouth] ?? 0.0
}
We will follow the same strategy for the eyeBrows, indexing into a dictionary.
private var eyeBrowTilts = [
	FacialExpression.EyeBrows.Relaxed: 0.5,
	.Furrowed: -0.5,
	.Normal: 0.0
]

private func updateUI() {
	...
	faceView.eyeBrowTilt = eyeBrowTilts[facialExpression.eyeBrows] ?? 0.0
}
Try running the application at this point, you can guess that the face will look like what we set it to in the controller when we initialised the model so eyes are open, eyebrows are normal and a smile. However, most likely the application will not look like this. The only reason it may is if you have coincidently set these values in the attributes inspector for the FaceView in the storyboard.
This is because didSet for the facialExpression variable is not called at initialisation. Why? because the didSet functionality is only added after the facialExpression has been initialised. To deal with this, we need a didSet for the outlet that we created for the faceView. This outlet is created when iOS wires everything up, and so is the ideal time to call the updateUI() in our case. Go ahead and add this didSet for the faceView outlet variable. So now we are updating the UI when the facialExpression changes, and when the faceView is first hooked up.
Rerun the application and now the face should look like how it is set up in the model. You can play around with the initialisation values to ensure that the FaceView is being updated on initialisation.
With that we will conclude this episode allowing for a fresh beginning in the next episode to take a look at gestures in iOS.