The drawing side of iOS development:
A view represents a rectangular area with a defined coordinate system that is used for drawing and handling touch events. There is this concept of a view hierachy, where each view can have only one superview, but can have many subviews. This view hierachy can be modfied either graphically (through Xcode) or through the use of code.
In this episode we will begin with a fresh new iOS applicaiton called FaceIt. So launch Xcode and create a new single view iOS application with exactly the same settings as how we created the calculator application. However, try to do this yourself before looking back. As we did previously, move all the files apart from the storyboard and viewcontroller to a 'Supporting Files' folder.
We will start working with the ViewController file. Again, as we did before, we will remove the included functions, and start with a blank ViewController class. However, it's a good idea to give the view controller a better name, rather than leave it in its generic form. We will be creating a 'face', so let's call this controller the FaceViewController. However, it's not as simple as just renaming the file and changing the class name in the code. You also need to edit the storyboard so that it now references this class. To do this, open up the Main.storyboard file and navigate to the identity inspector tab on the right.
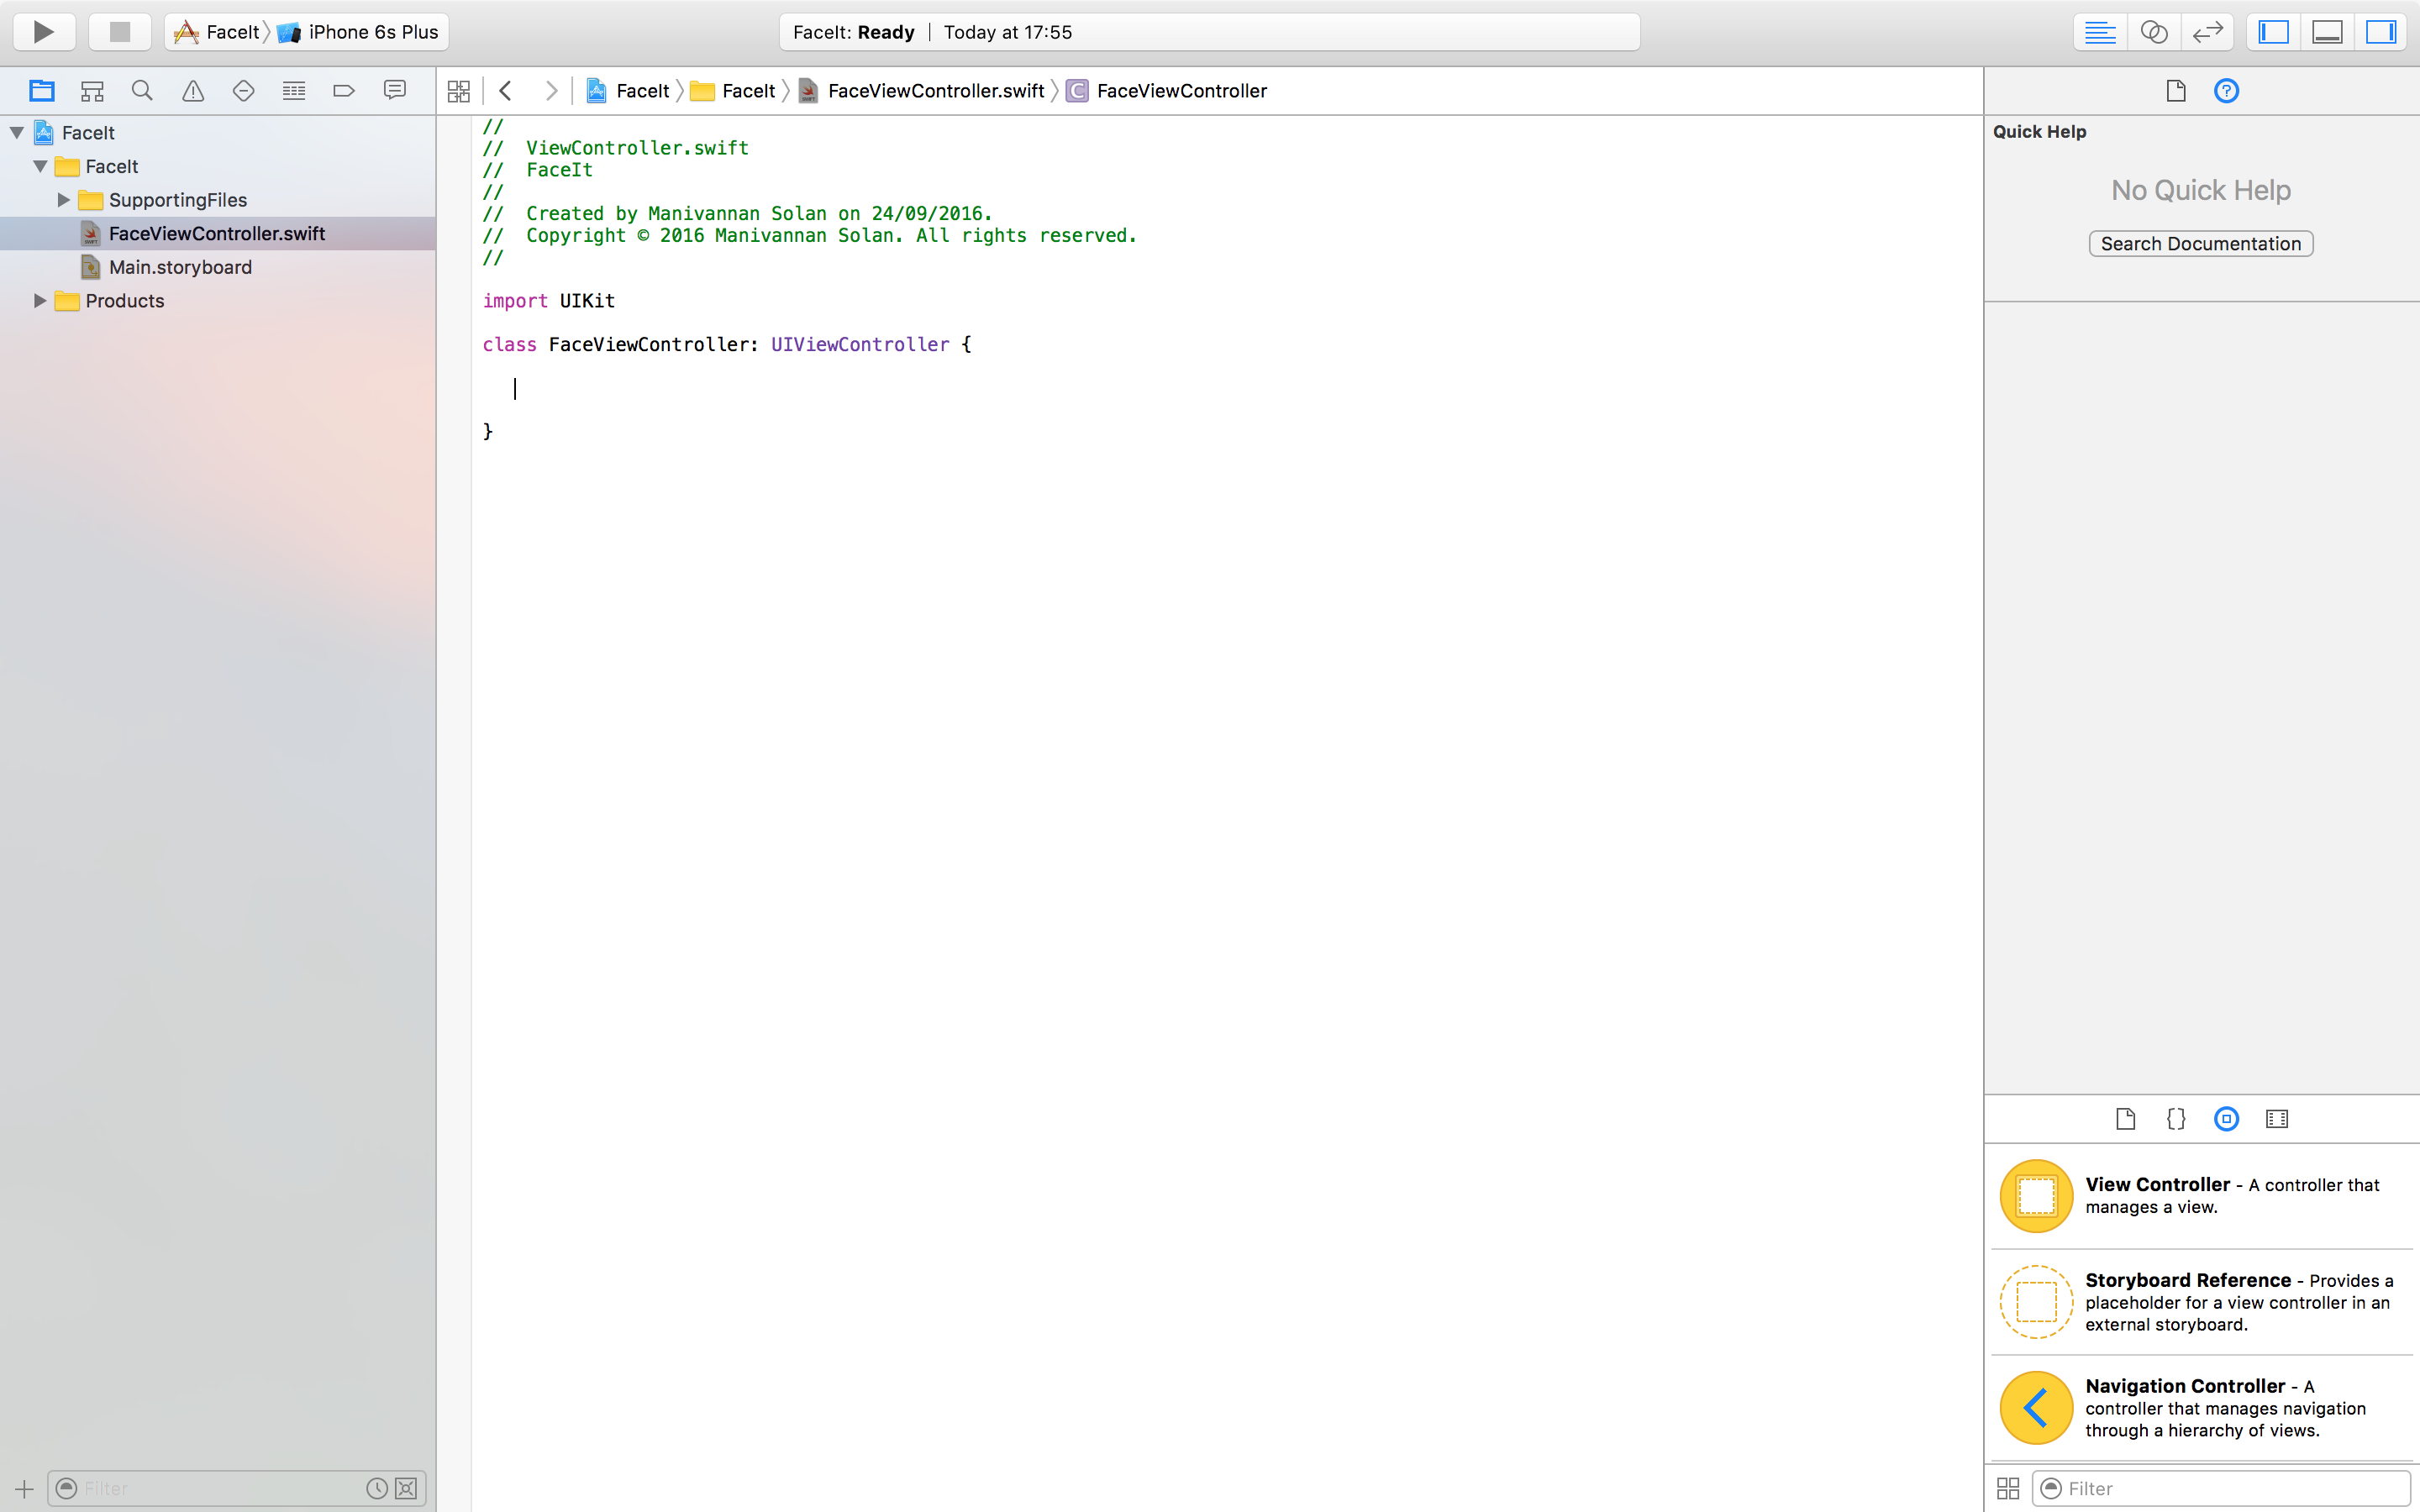 Figure 1: Renaming ViewController to FaceViewController.
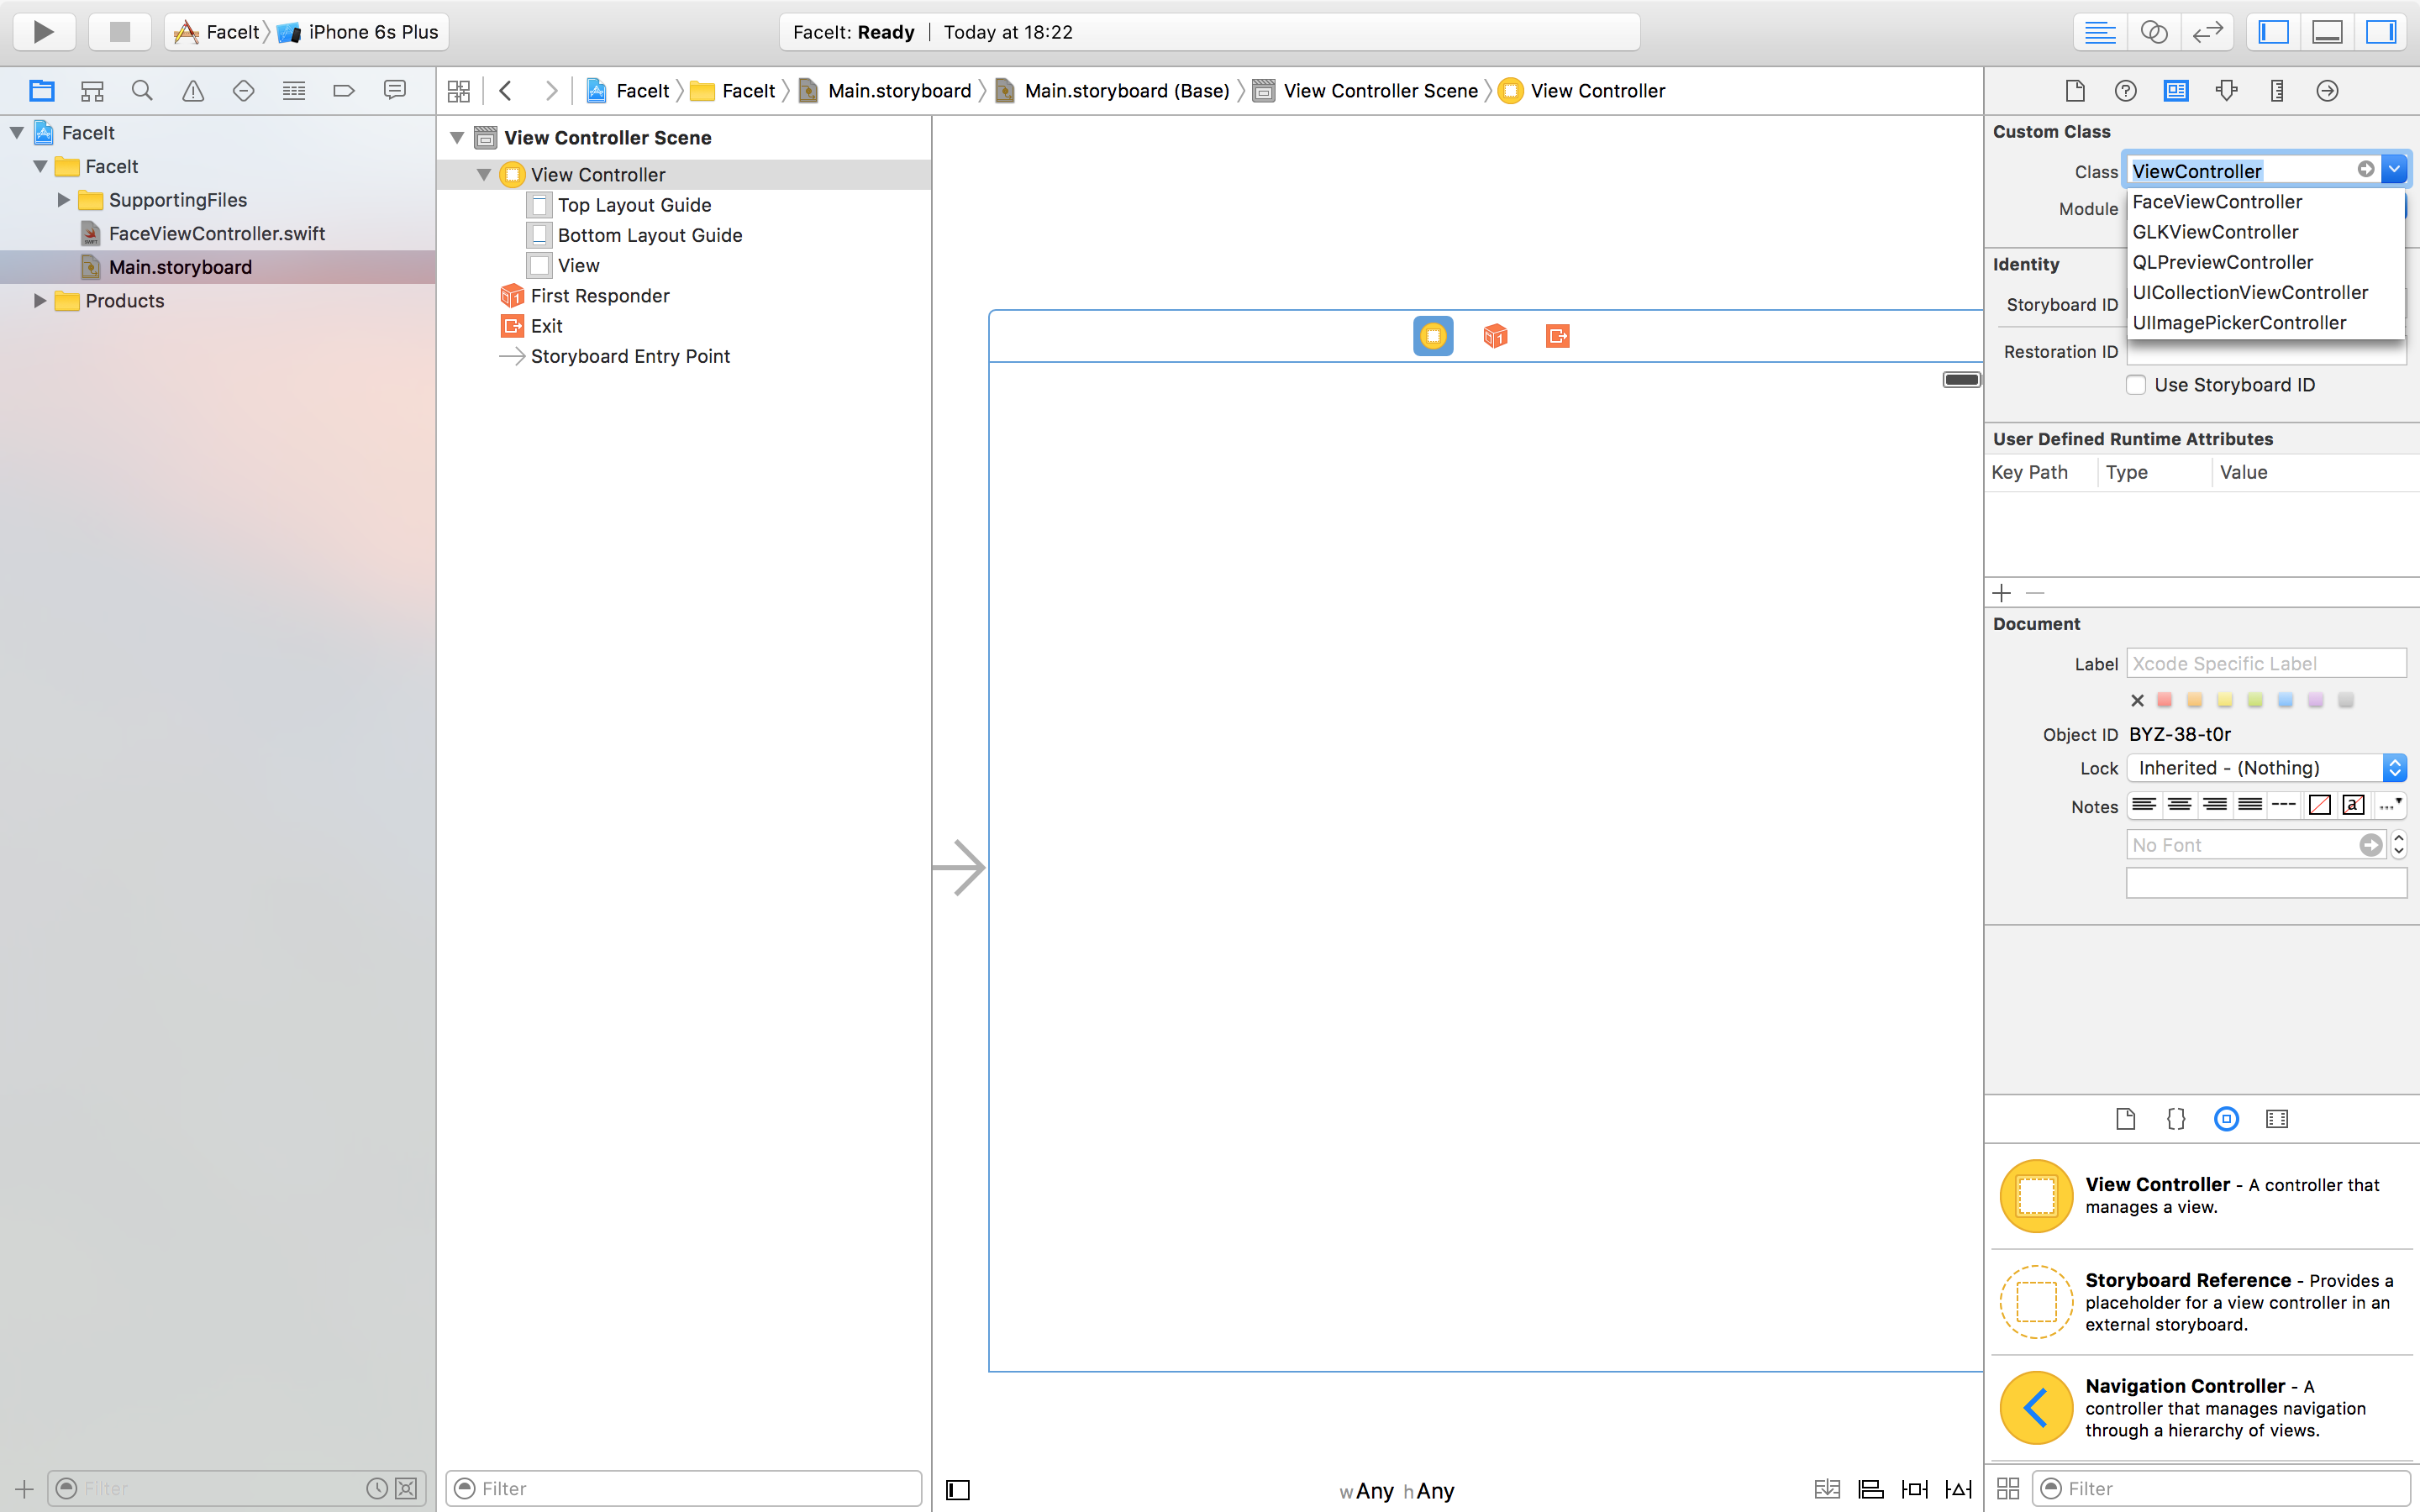 Figure 2: Identity inspector for storyboard.
Tip: If you can't get to the stage of figure 2, then make sure you are selecting the view controller in the storyboard, it can be selected by clicking on the top bar, above the status bar (of the iOS app) on the storyboard.
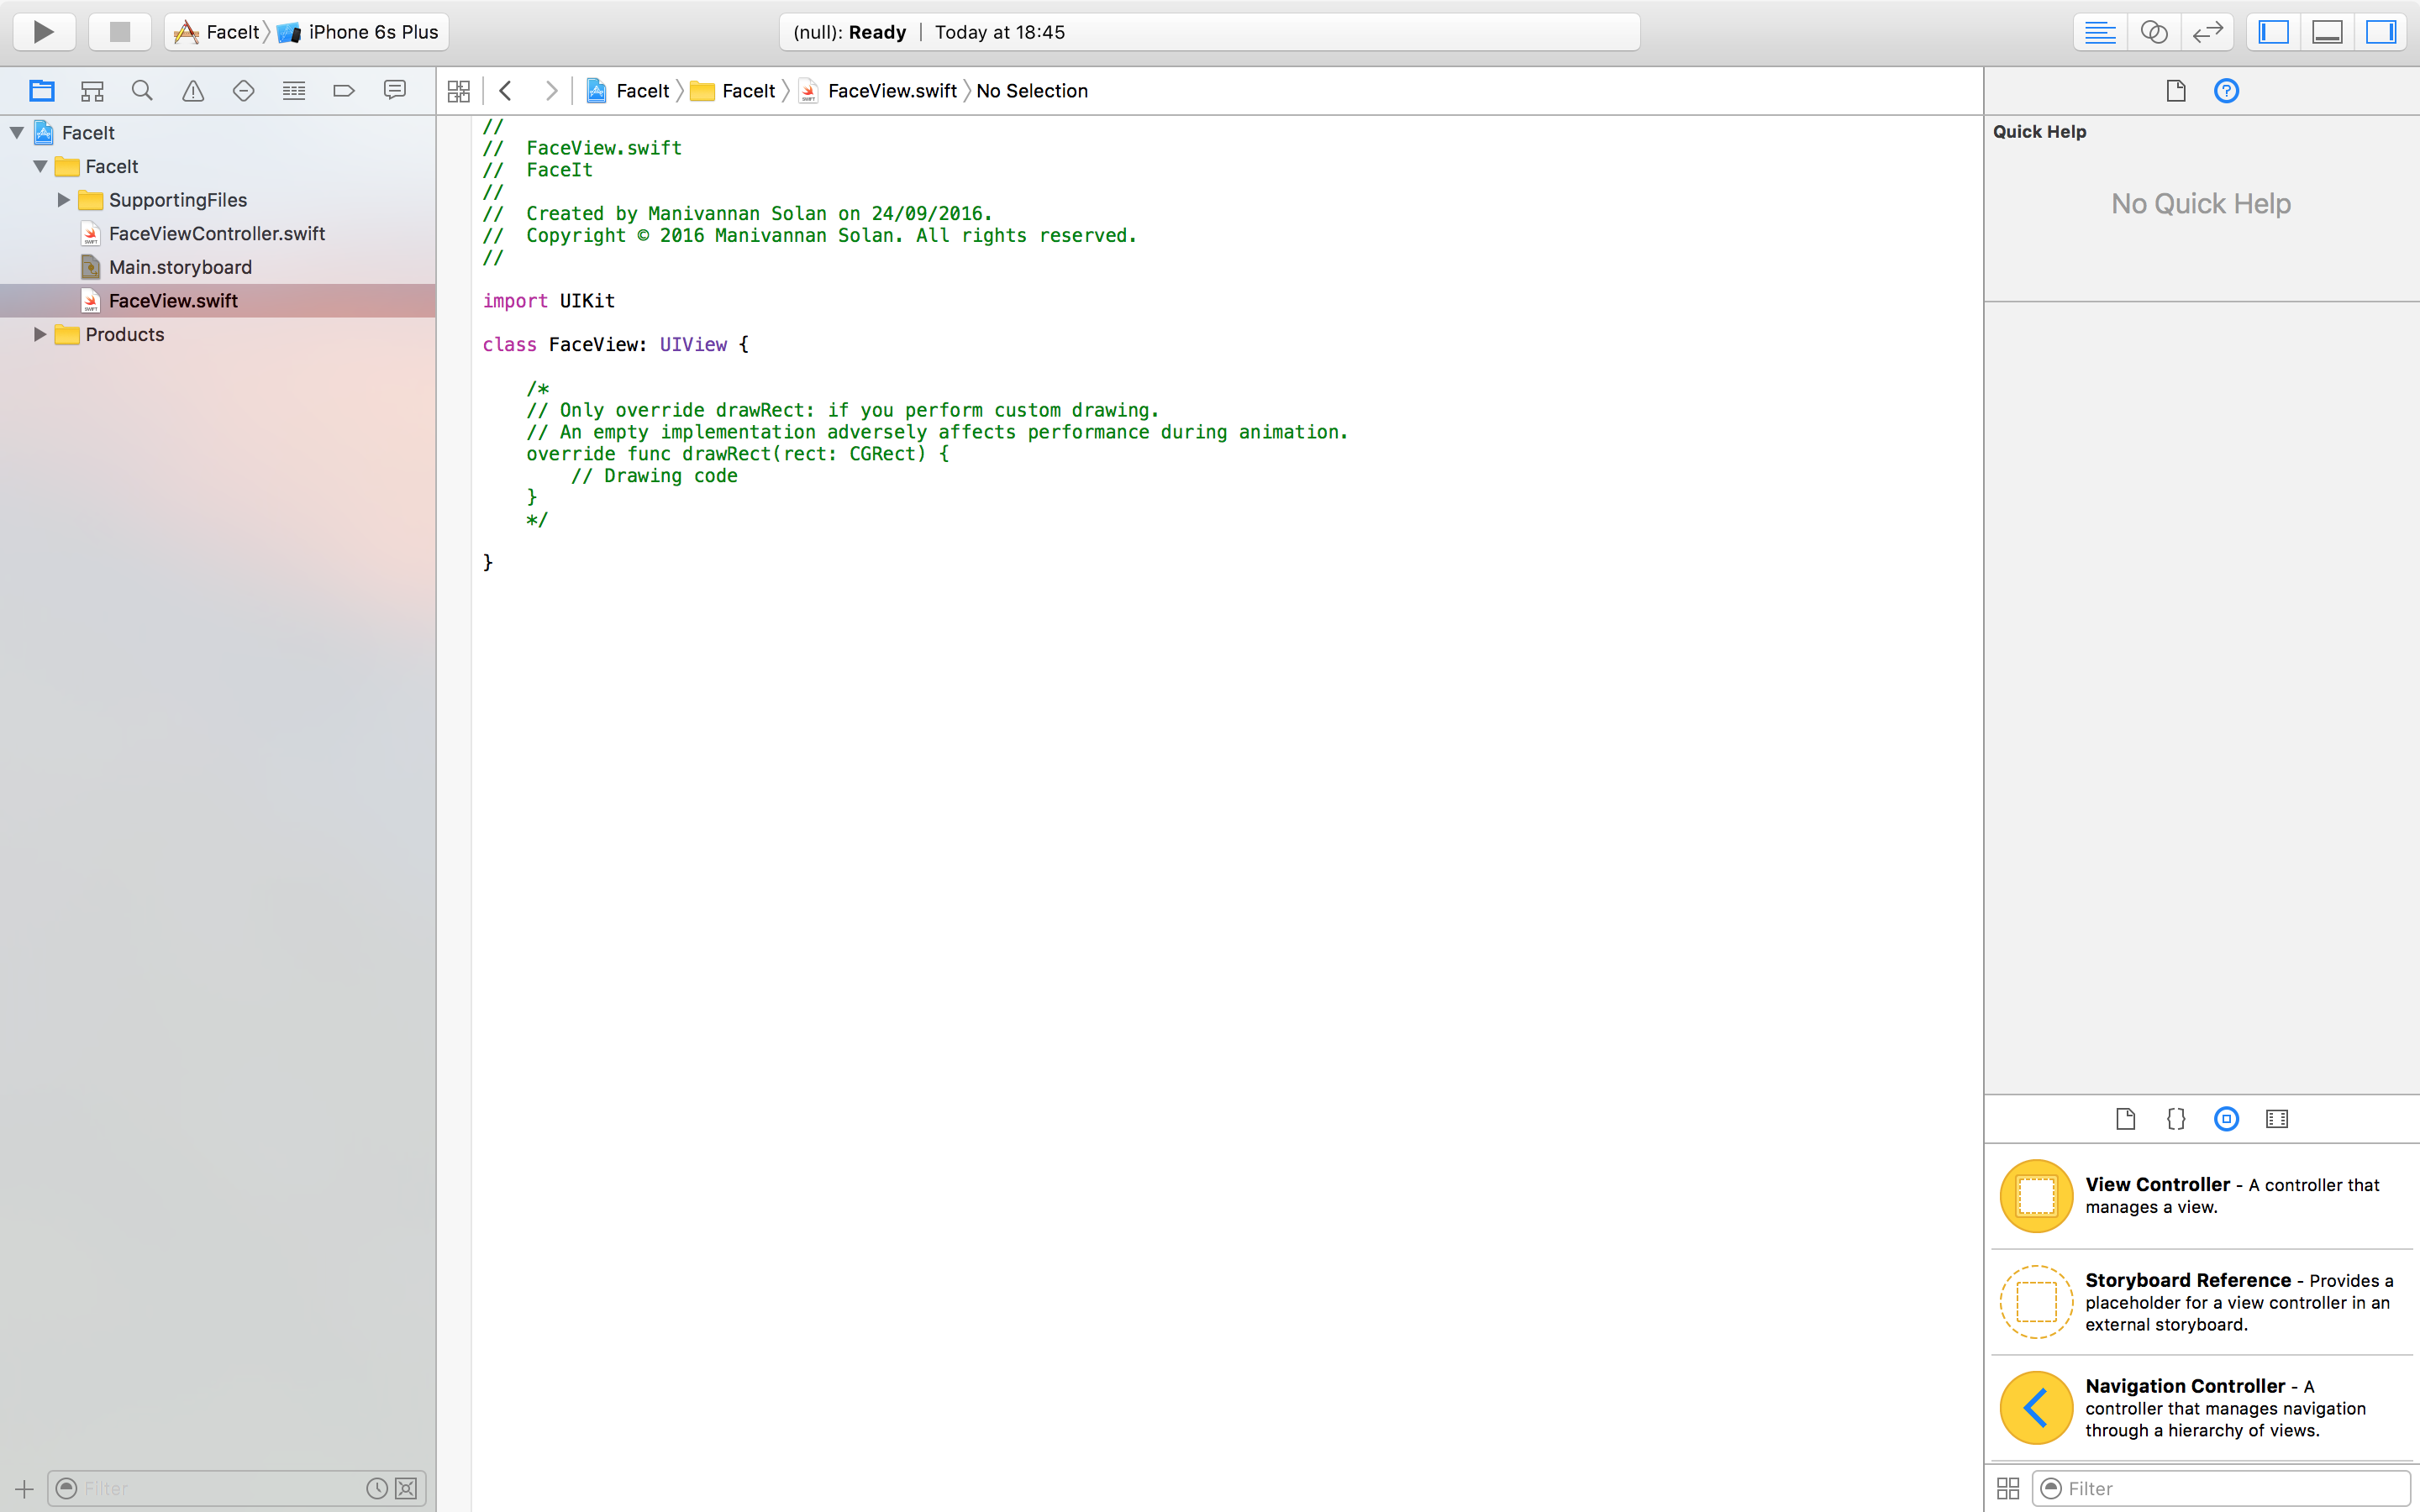
In order to draw we need a view, so why don't we create a view that's specific to what we are going to draw? To do this we create a class that is a subclass of UIView. Create a new iOS Cocoa Touch class file by going to File->New->File and selecting iOS/Source/CocoaTouchClass. Be sure to give it a name (e.g. FaceView) and select the right subclass (UIView).
The class will have a commented out implementation of drawRect. This should be left commented out if you do not wish to implement it, as there is no point in (re)drawing something that does not exist. As the name implies, this function determines what is drawn on this view.
We will begin implementing this method, so you can go ahead and uncomment it. The bounds variable is useful in getting measurements with respect to the current view's coordinate system. This should not be confused with the frame variable, which is with respect to the superview's coordinate system.
override func drawRect(rect: CGRect) {
        let width = bounds.size.width
        let height = bounds.size.height

        let skullRadius = min(height, width) / 2;
        let skullCenter = CGPoint(x: bounds.midX, y: bounds.midY)

        let skull = UIBezierPath(arcCenter: skullCenter,
			         radius: skullRadius,
			         startAngle: 0,
			         endAngle: CGFloat(2*M_PI),
			         clockwise: false)

        skull.lineWidth = 5.0

        UIColor.blueColor().set()
        skull.stroke()


}
We now need to add this newly created FaceView to our storyboard. To do this we drag a regular UIView from the palette in the bottom right corner into the storyboard. We then use the identity inspector, like we did earlier in this post, to change the class of this UIView to FaceView.
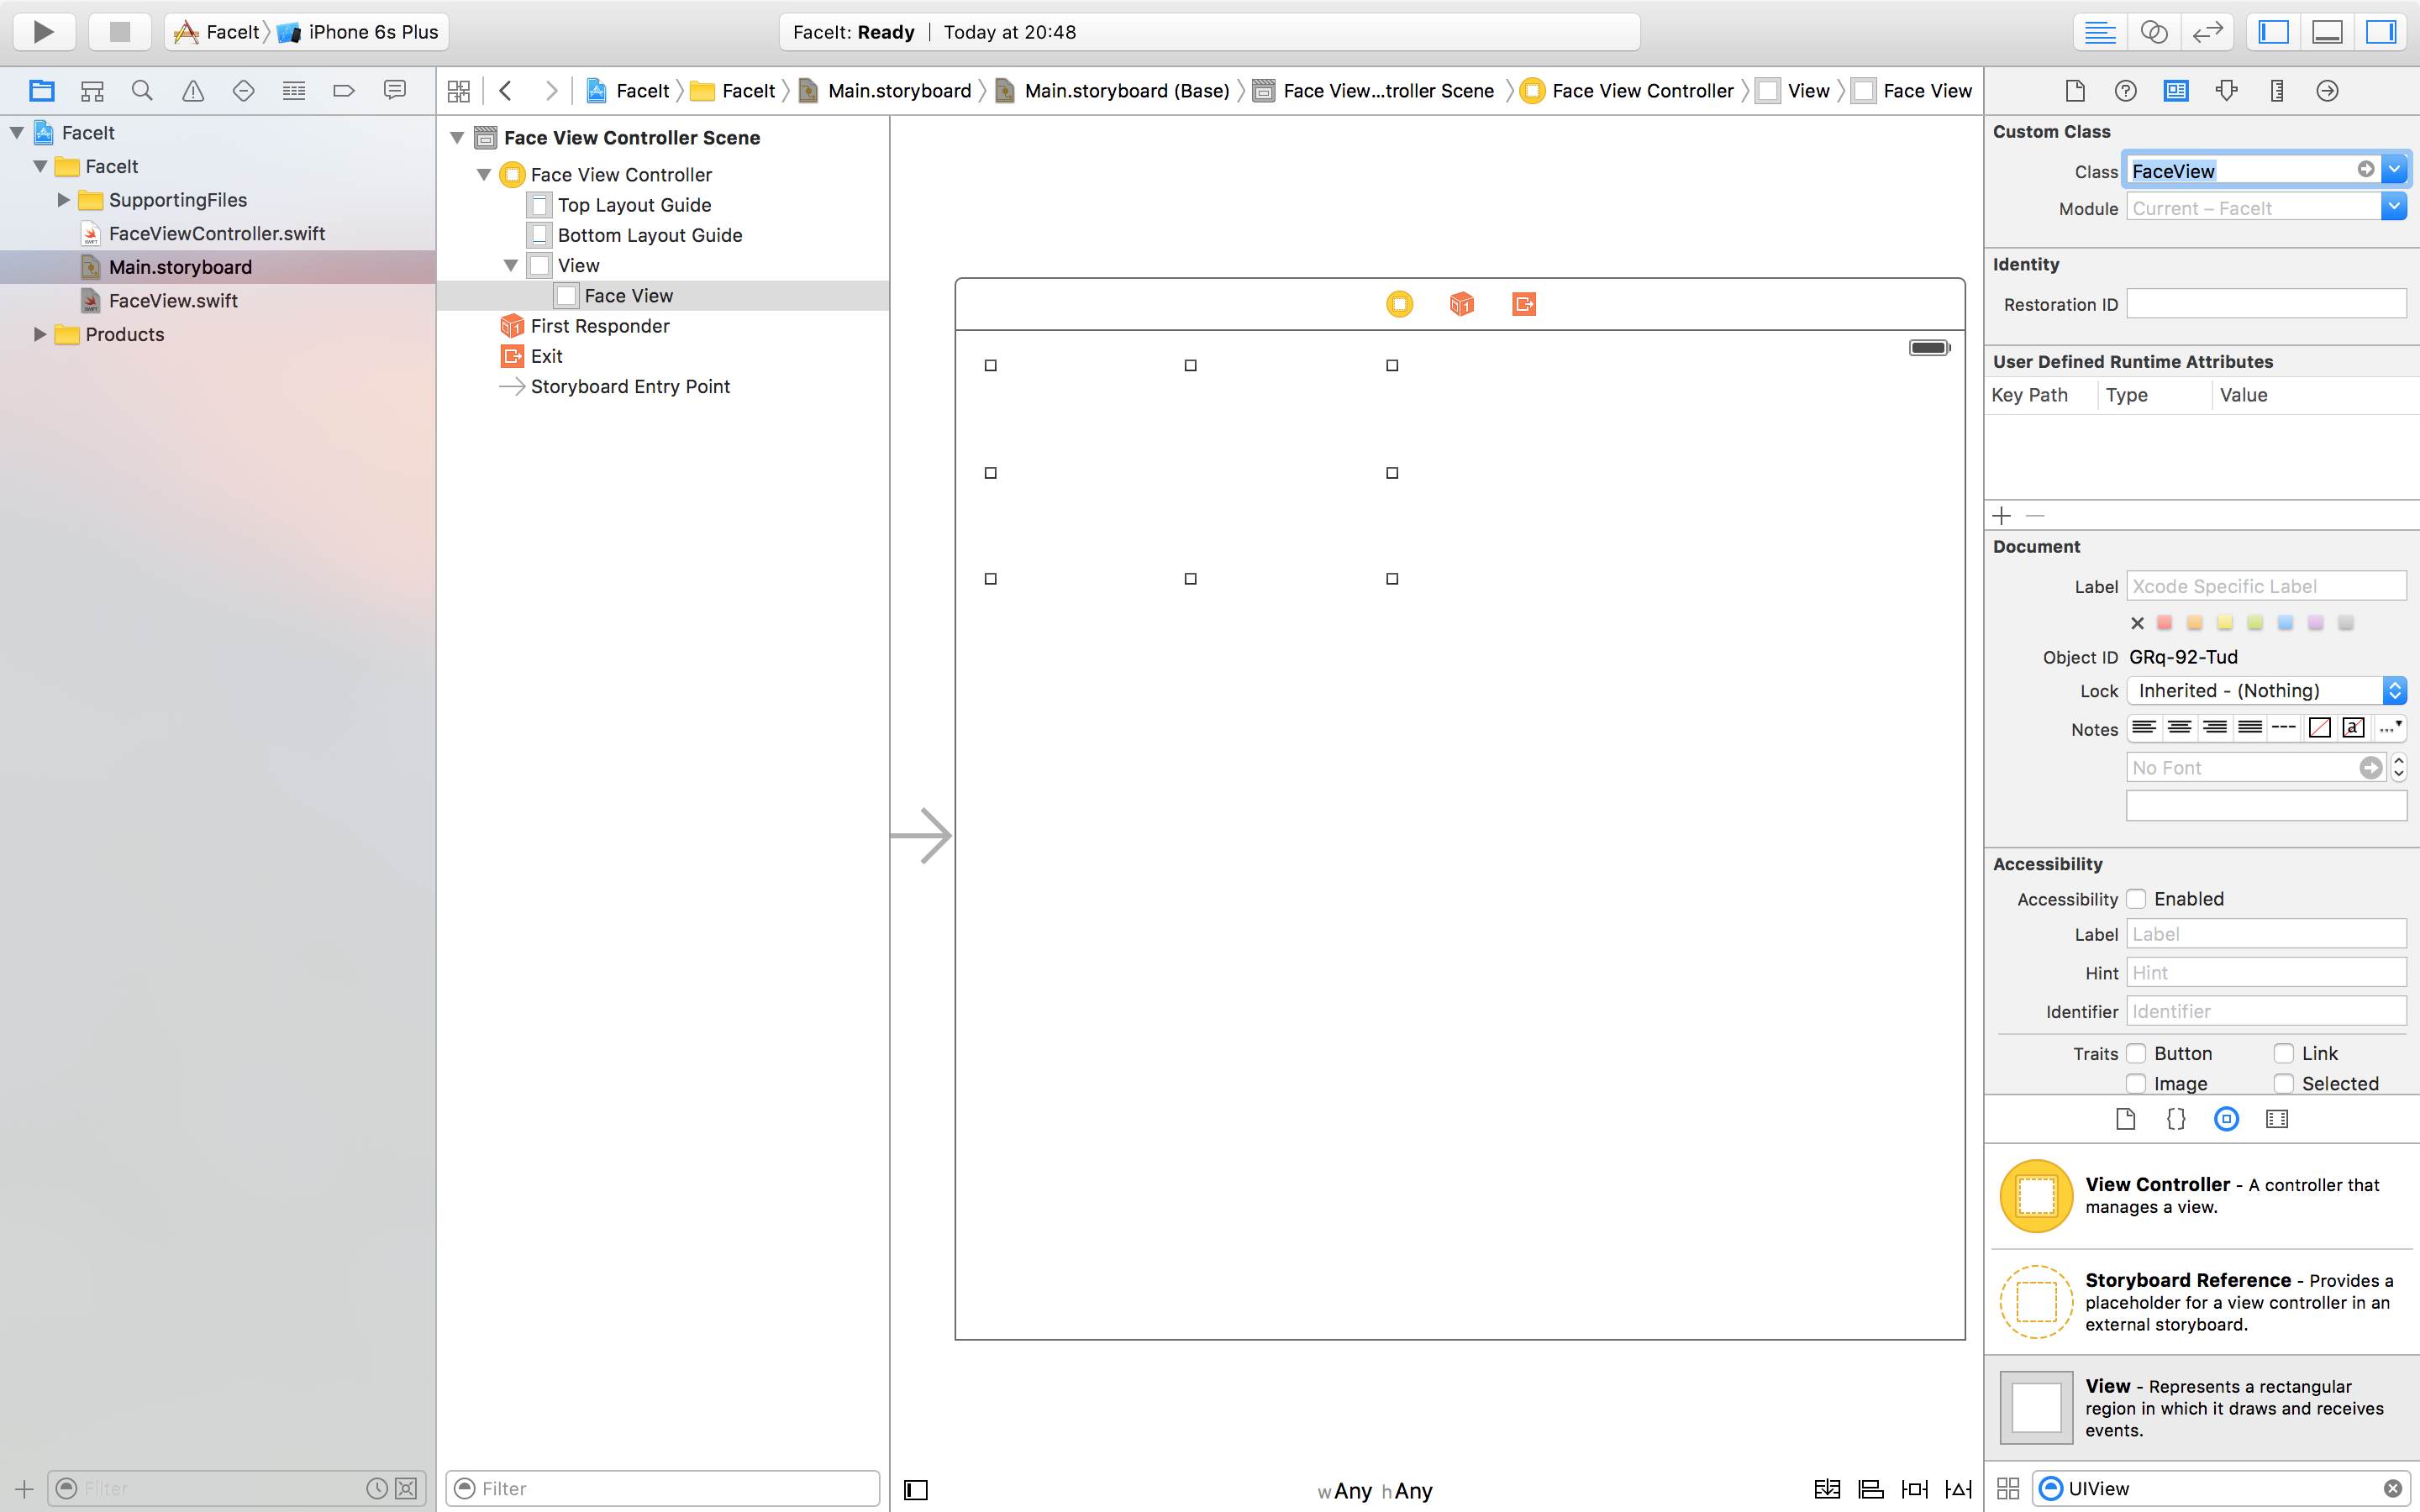 Figure 4: FaceView added to storyboard.
Now would be a good time to add some layout constraints to the FaceView. However, this might make you groan as it does require some time! Good news, we will now show you a shortcut for constraining a view to the edges of the screen. Resize the FaceView using your mouse and aligning the edges with the blue helper lines. The button in the lower right corner of the middle pane (the one with the triangle) will give you an option to 'Reset to suggested constraints' be sure to click on the one for the 'selected view' rather than all the views in the controller. This will add constraints with respect to the blue lines.
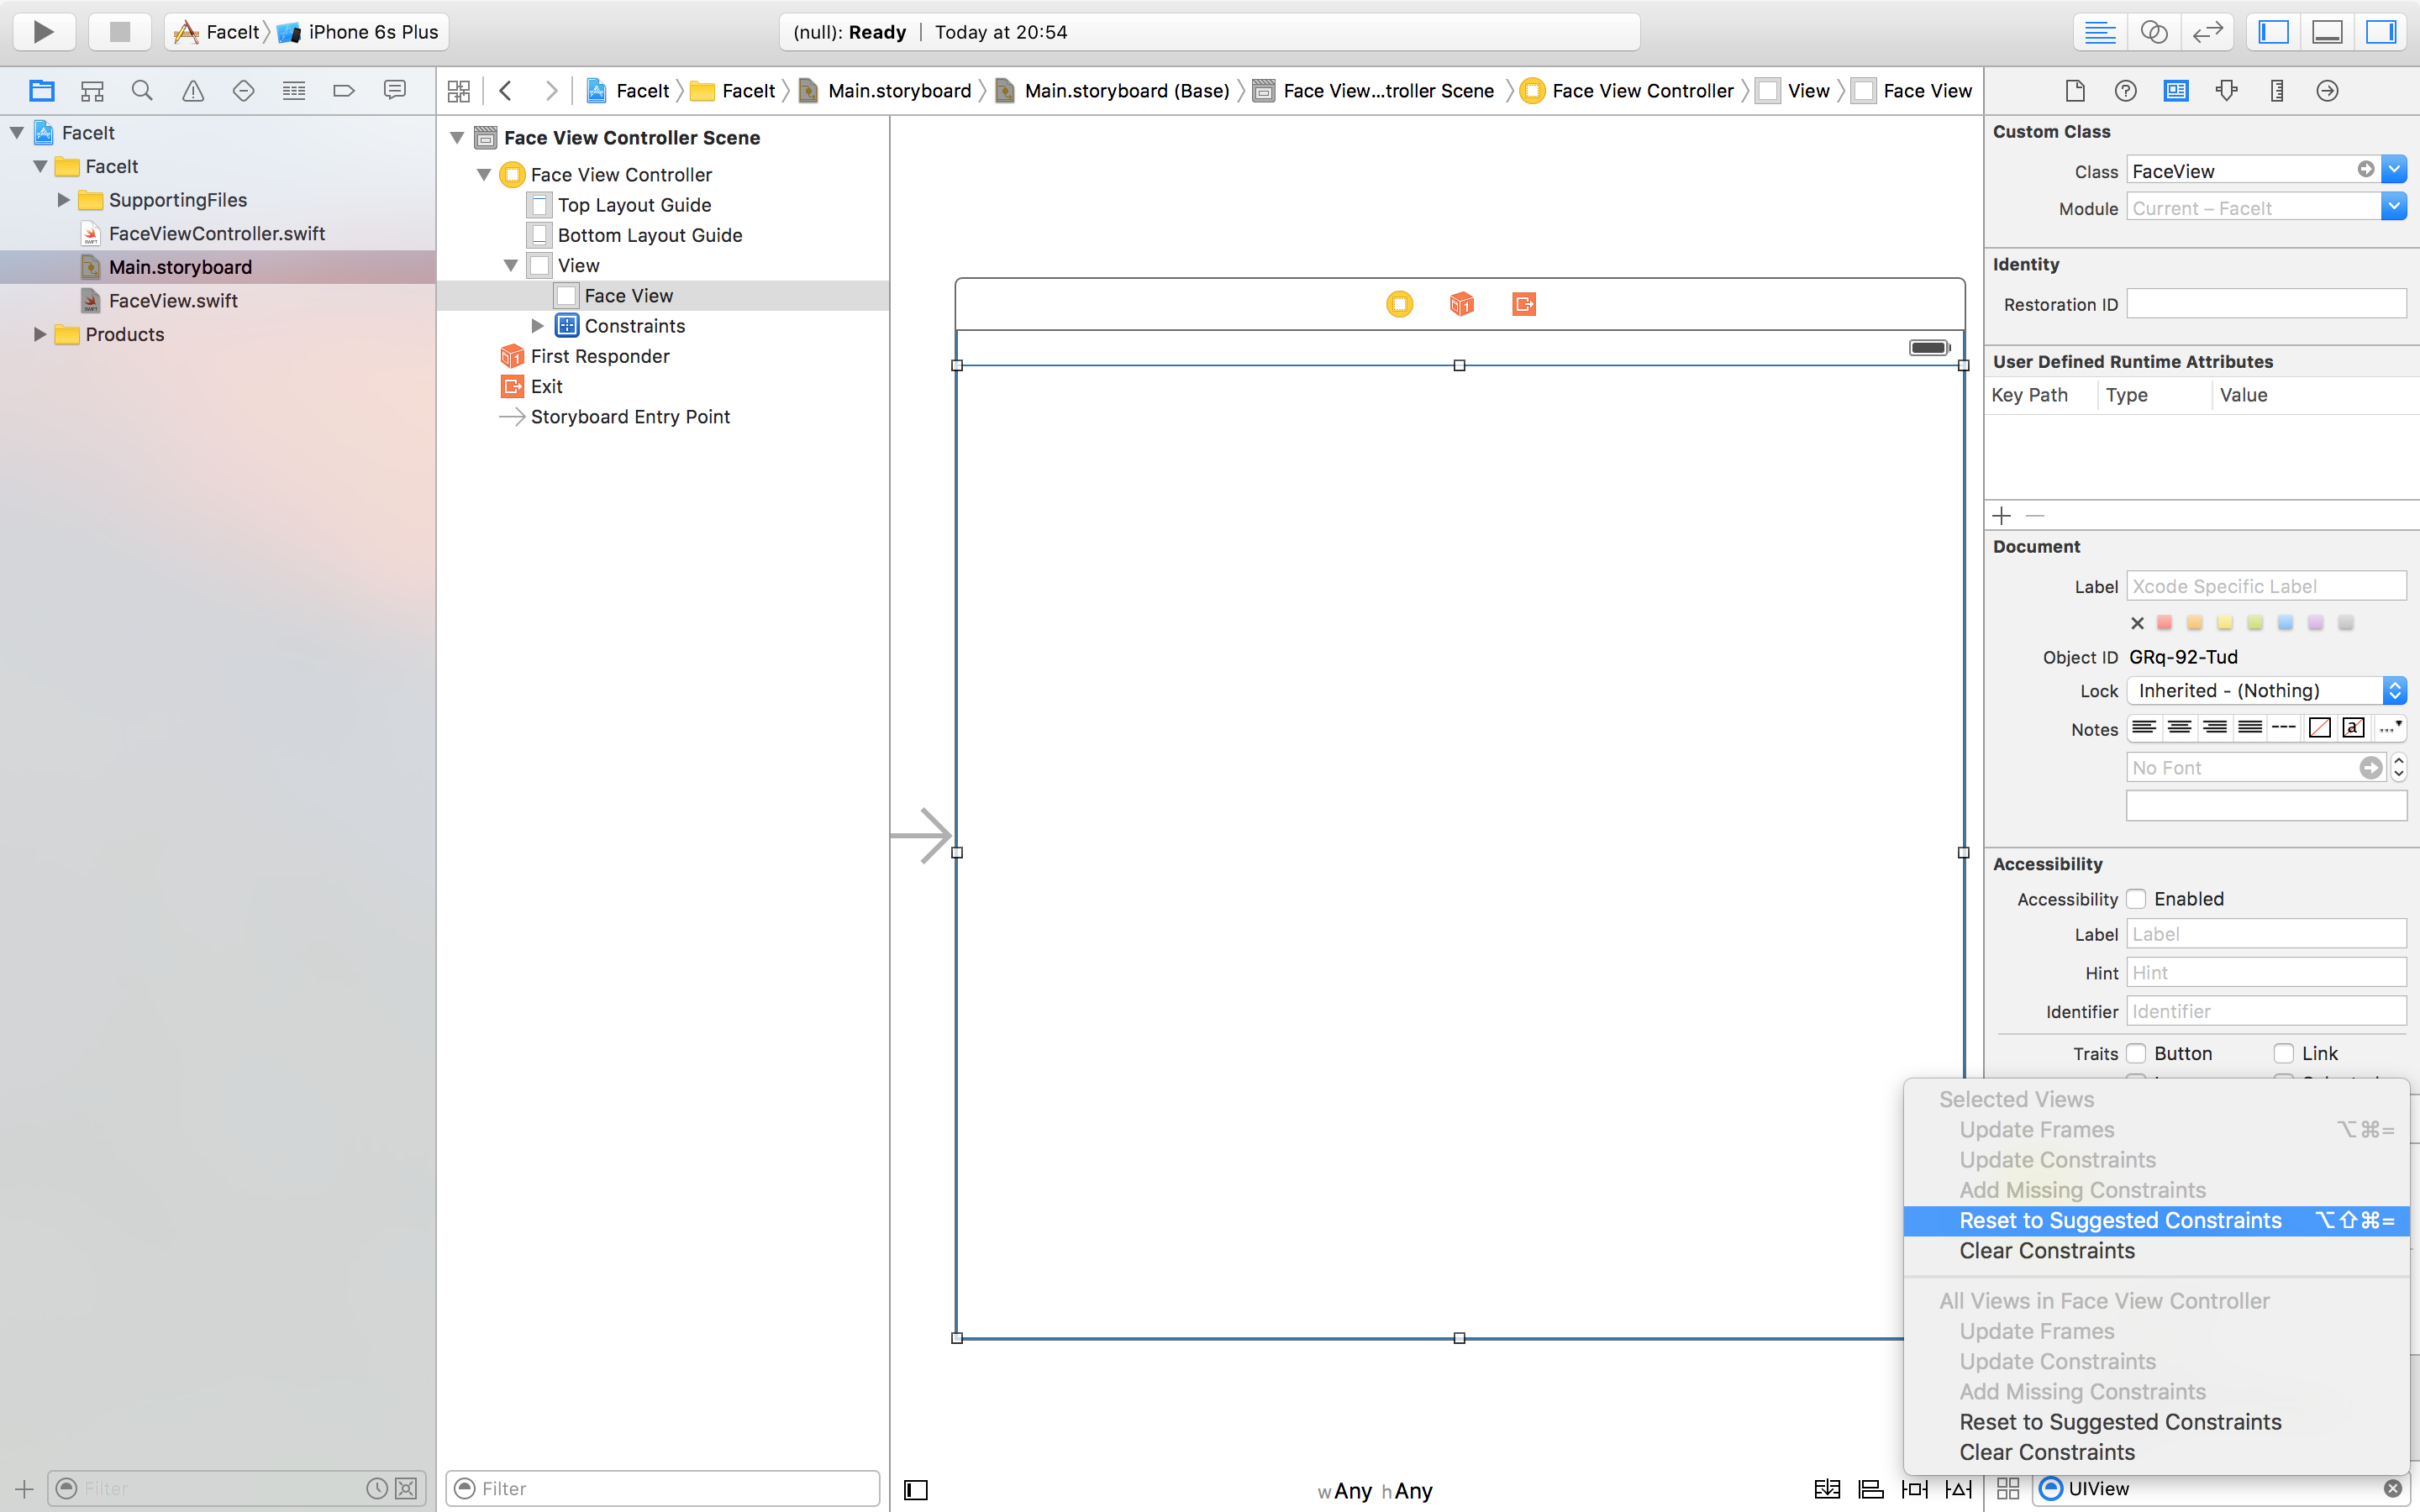 Figure 5: Shortcut to adding constraints.
You can check (whenever you need to) your constraints by selecting the appropriate view and navigating to the size inspector tab in the right hand pane, as shown in Figure 6. This will give you an overview of the constraints added to the view.
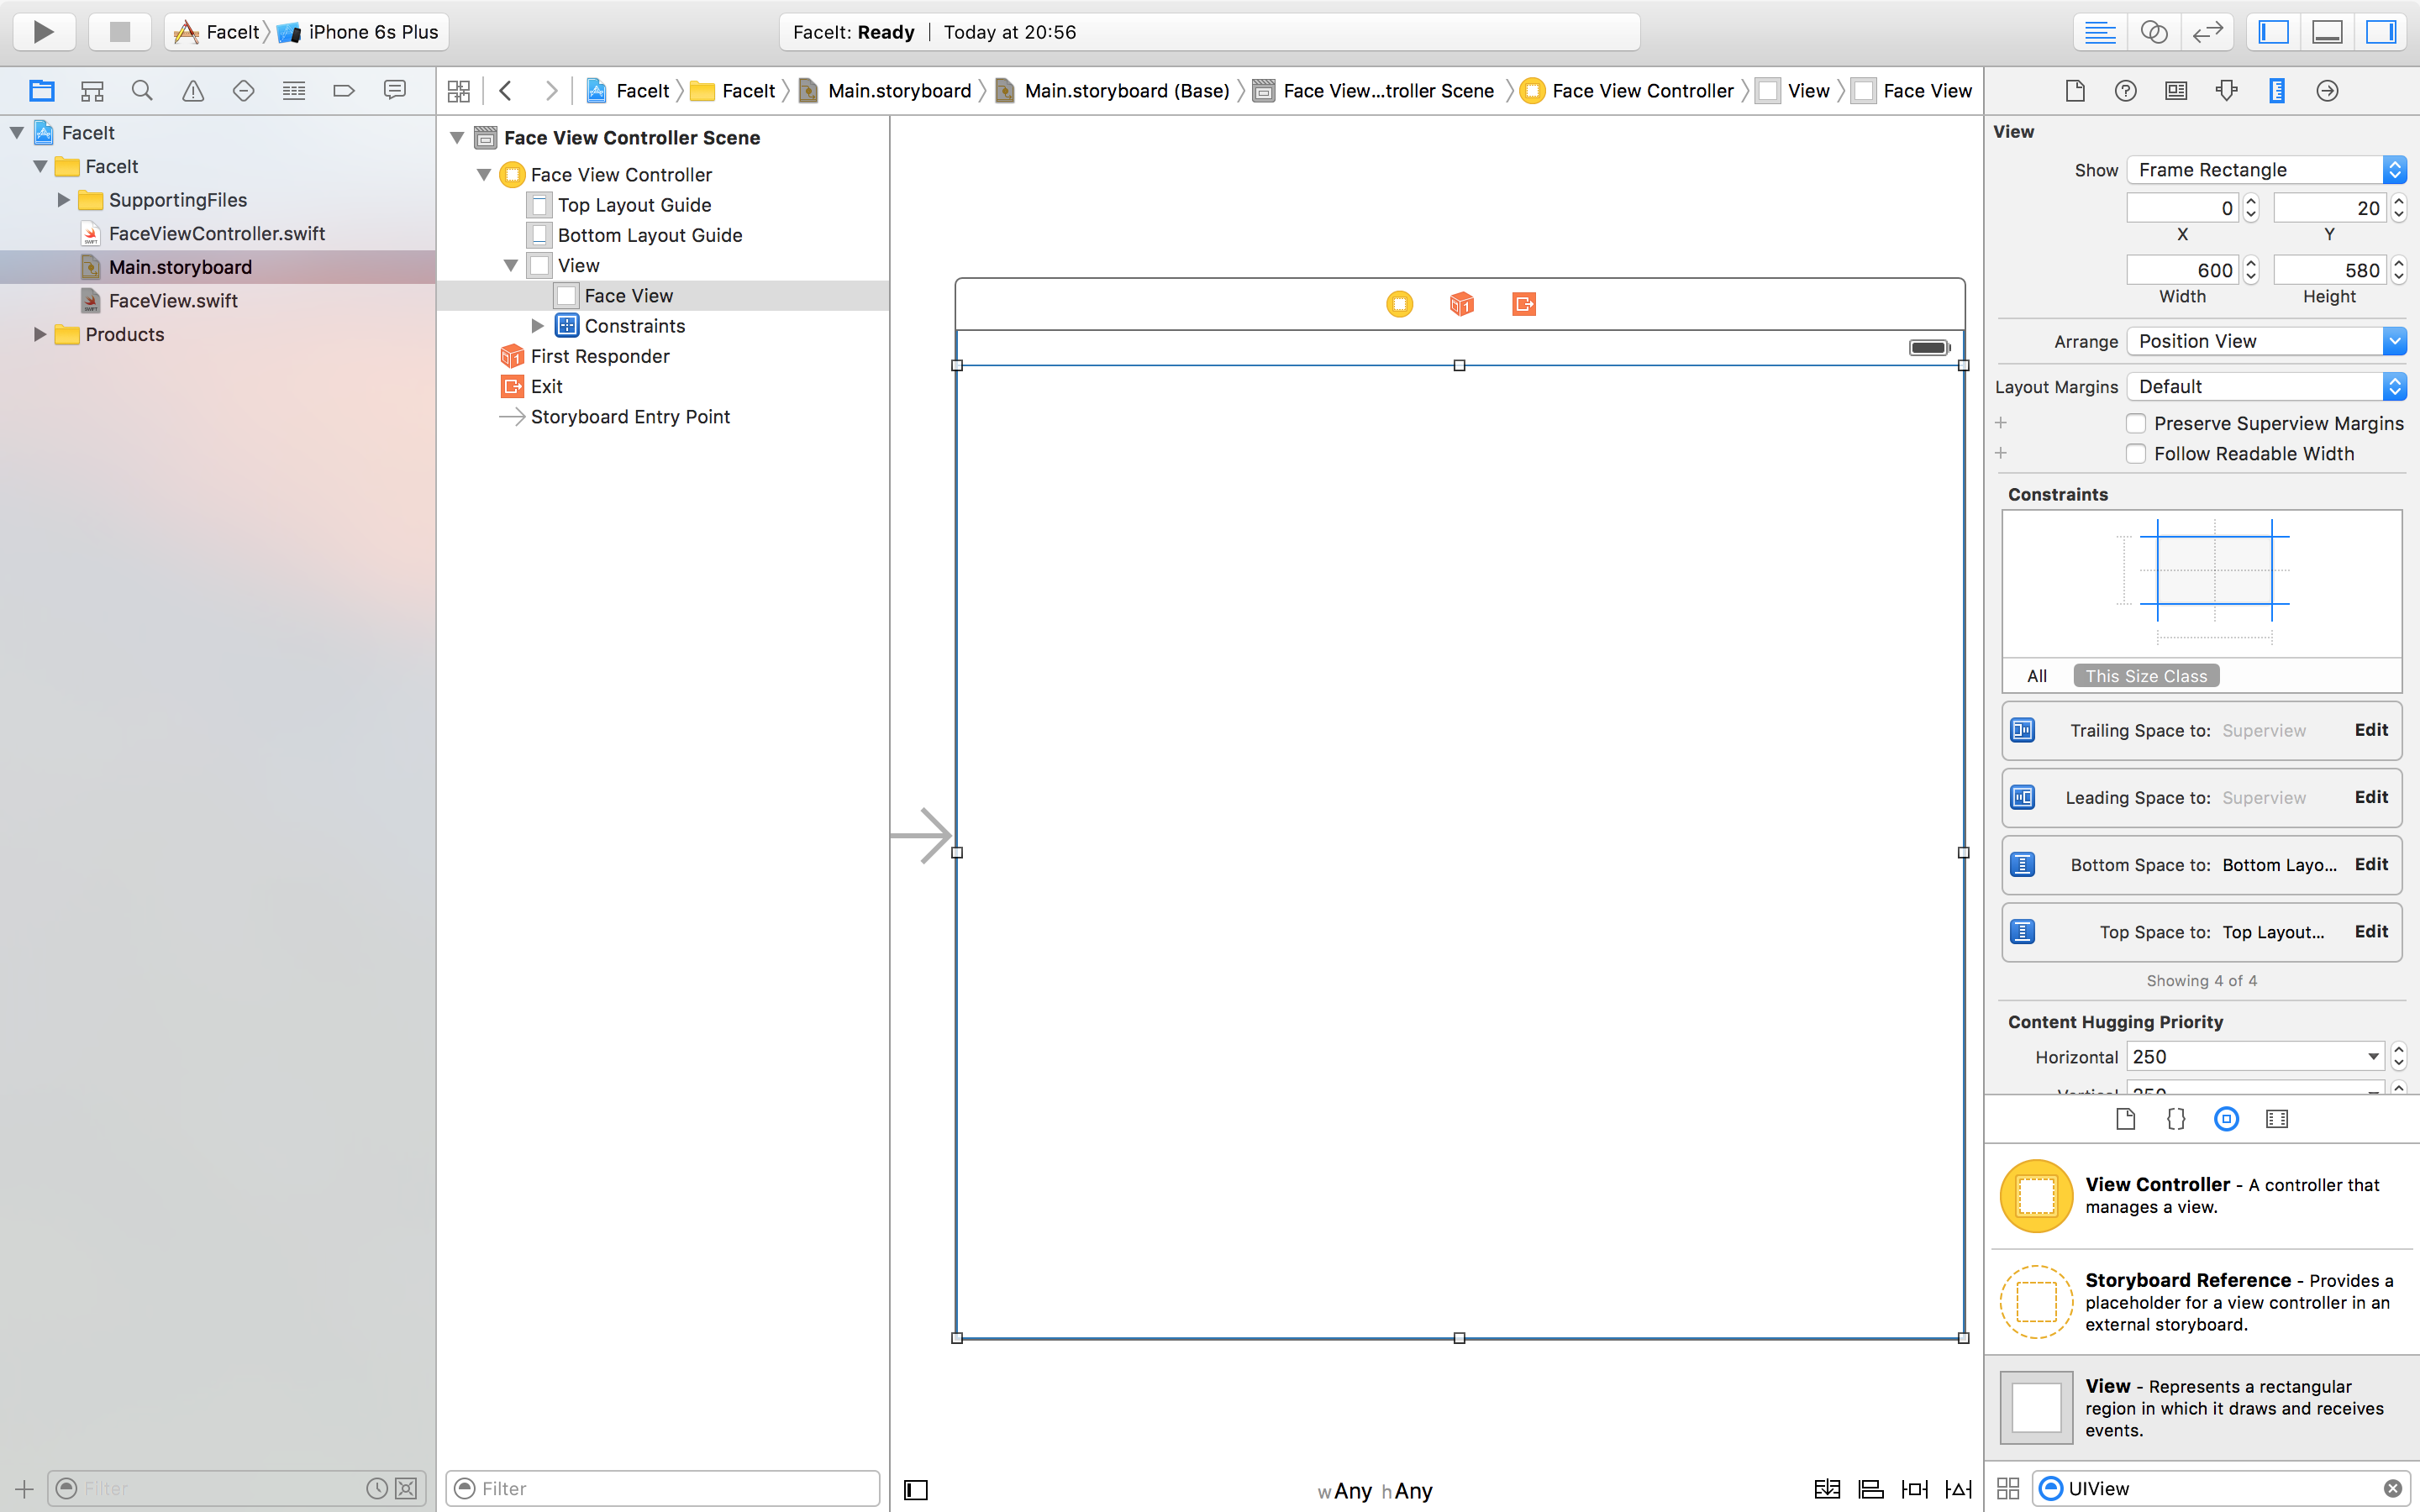 Figure 6: Using the size inspector to see layout constraints.
Now would be a good time to run your application and check whether you have managed to draw a circle to the screen. You should get something like Figure 7 on the left. However, when trying to rotate the screen the circle appears to be stretched as shown on the right of Figure 7. This is because the bounds of the application have changed, but the circle has not been redrawn.
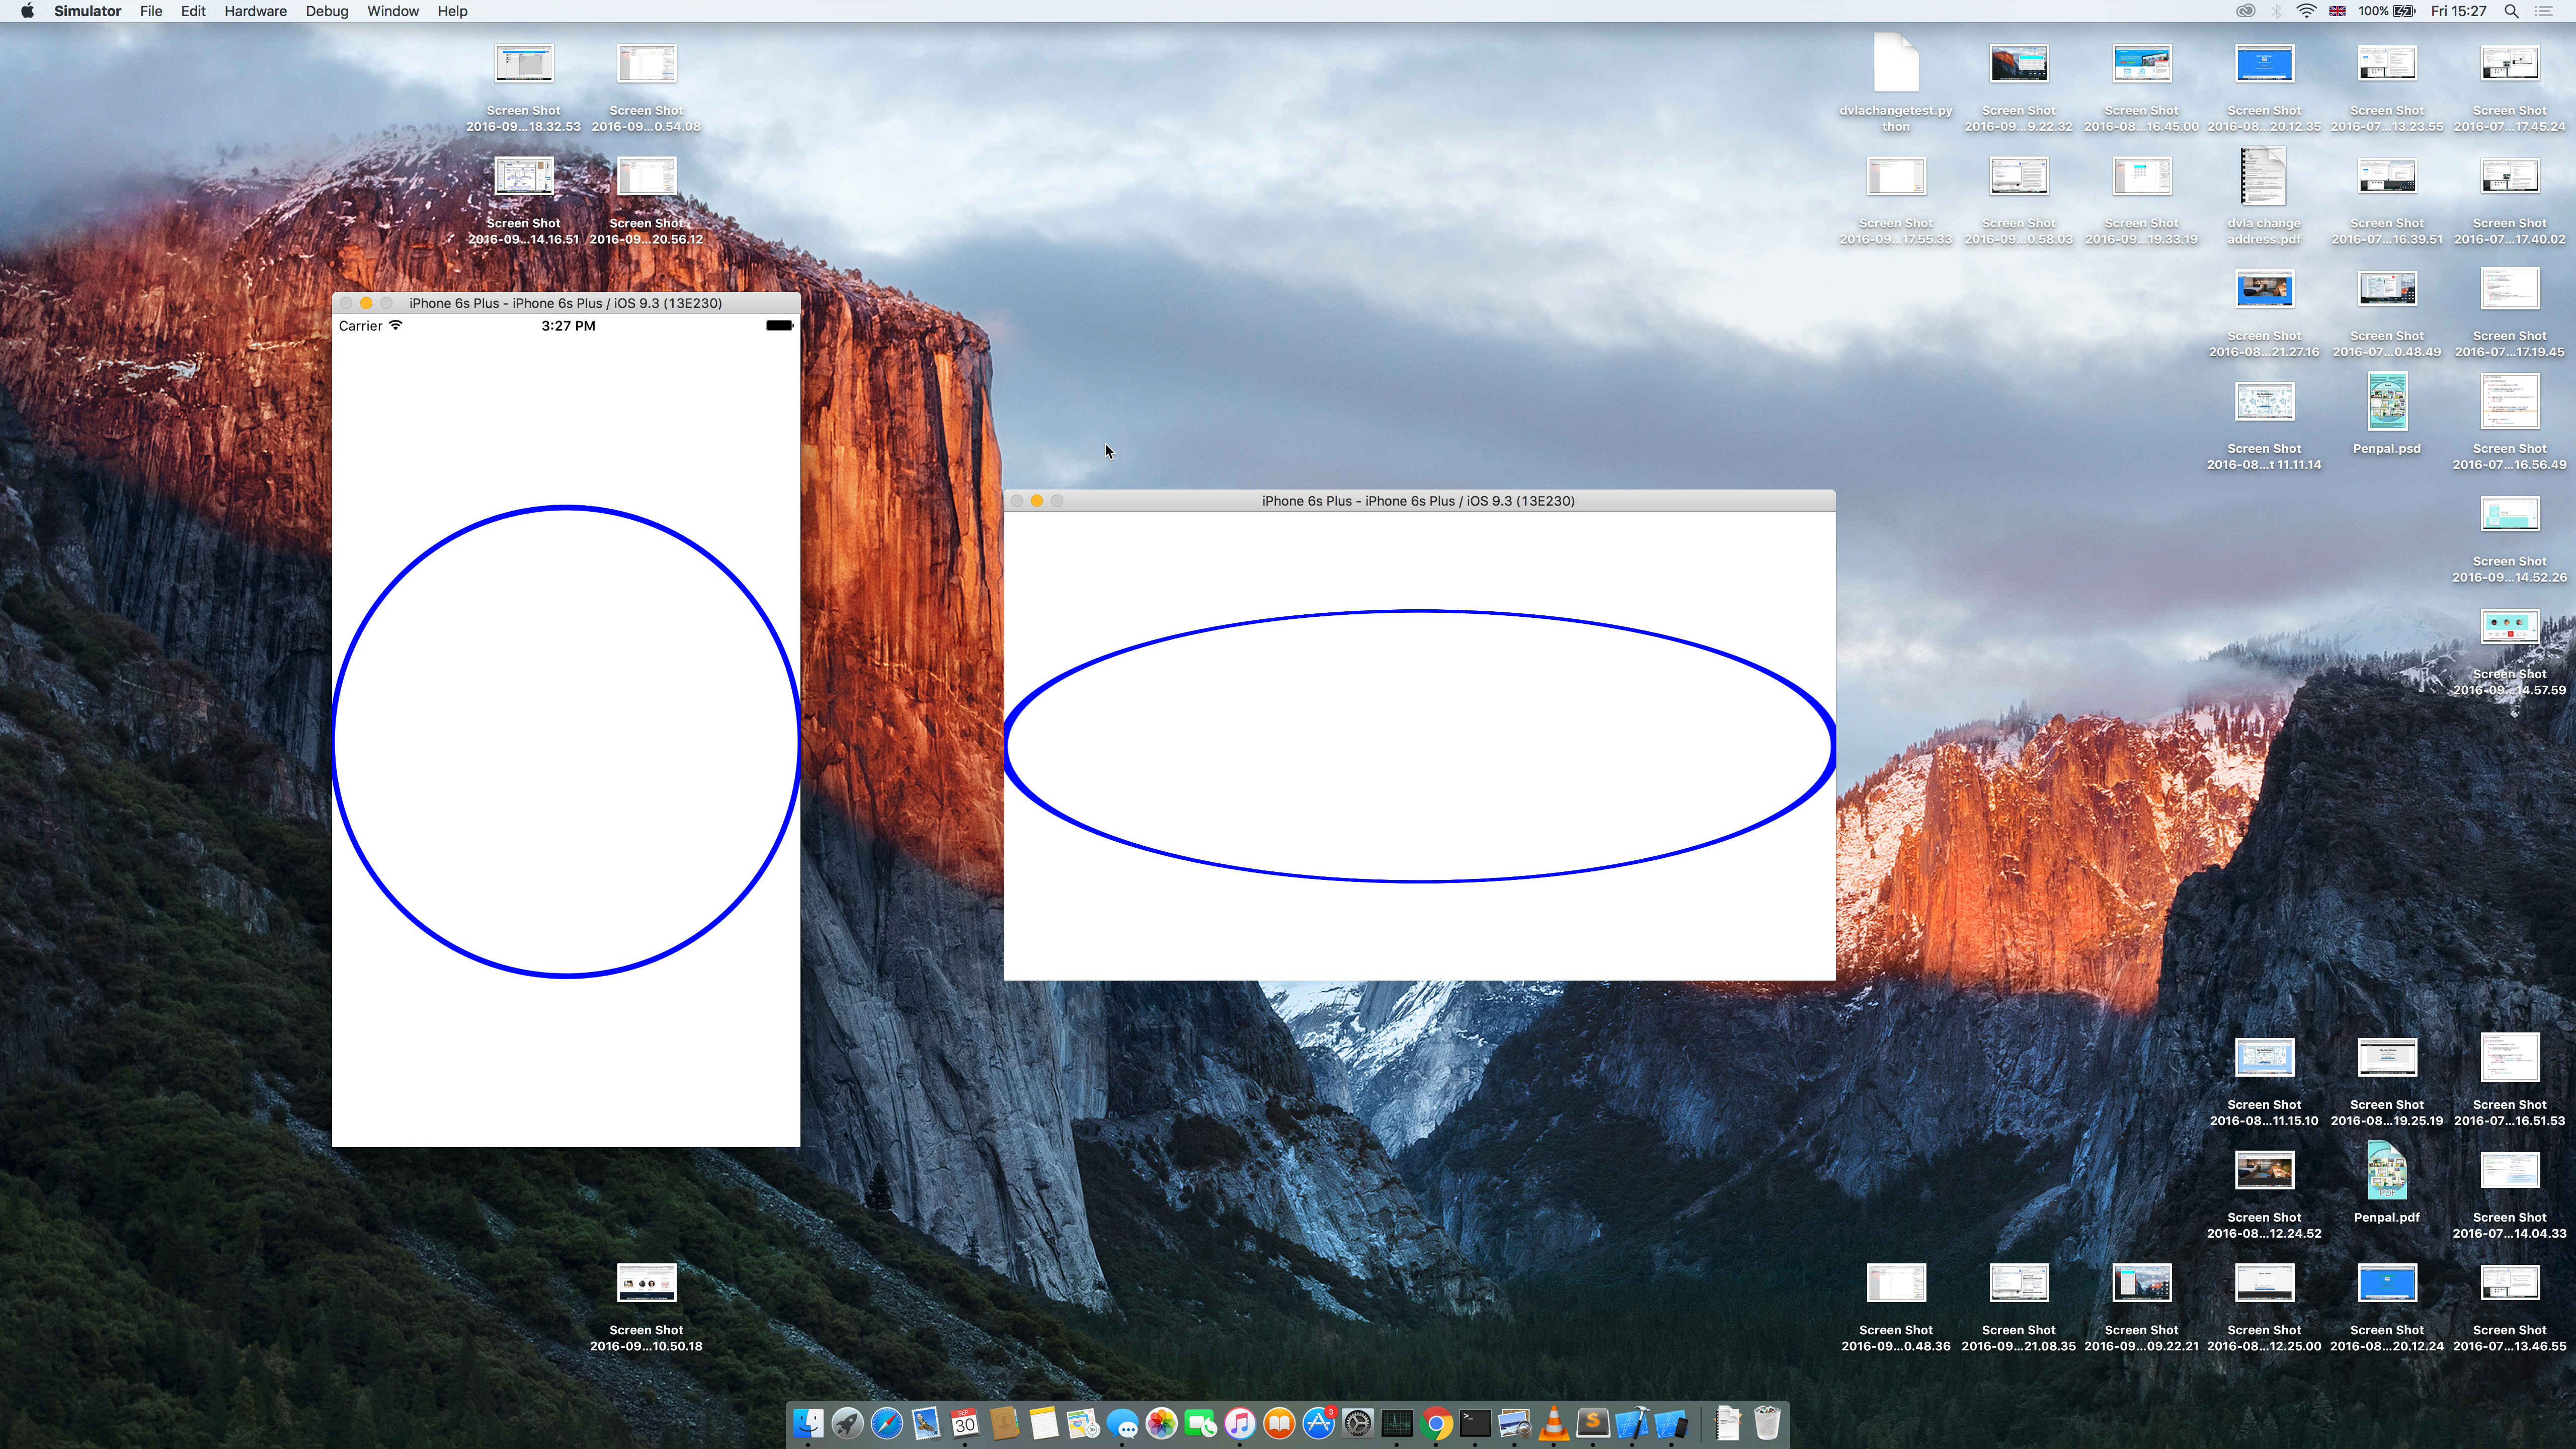 Figure 7: Checking that the circle is drawn.
To fix this we need to change the content mode of the FaceView. We do this by selecting the FaceView in the storyboard file, and in the attributes inspector 'mode' property select 'Redraw'. This will ensure that the circle is redrawn when the orientation of the device changes. (Instead of the default of scale to fill, which I guess is why some iPhone apps look distorted on larger devices?).
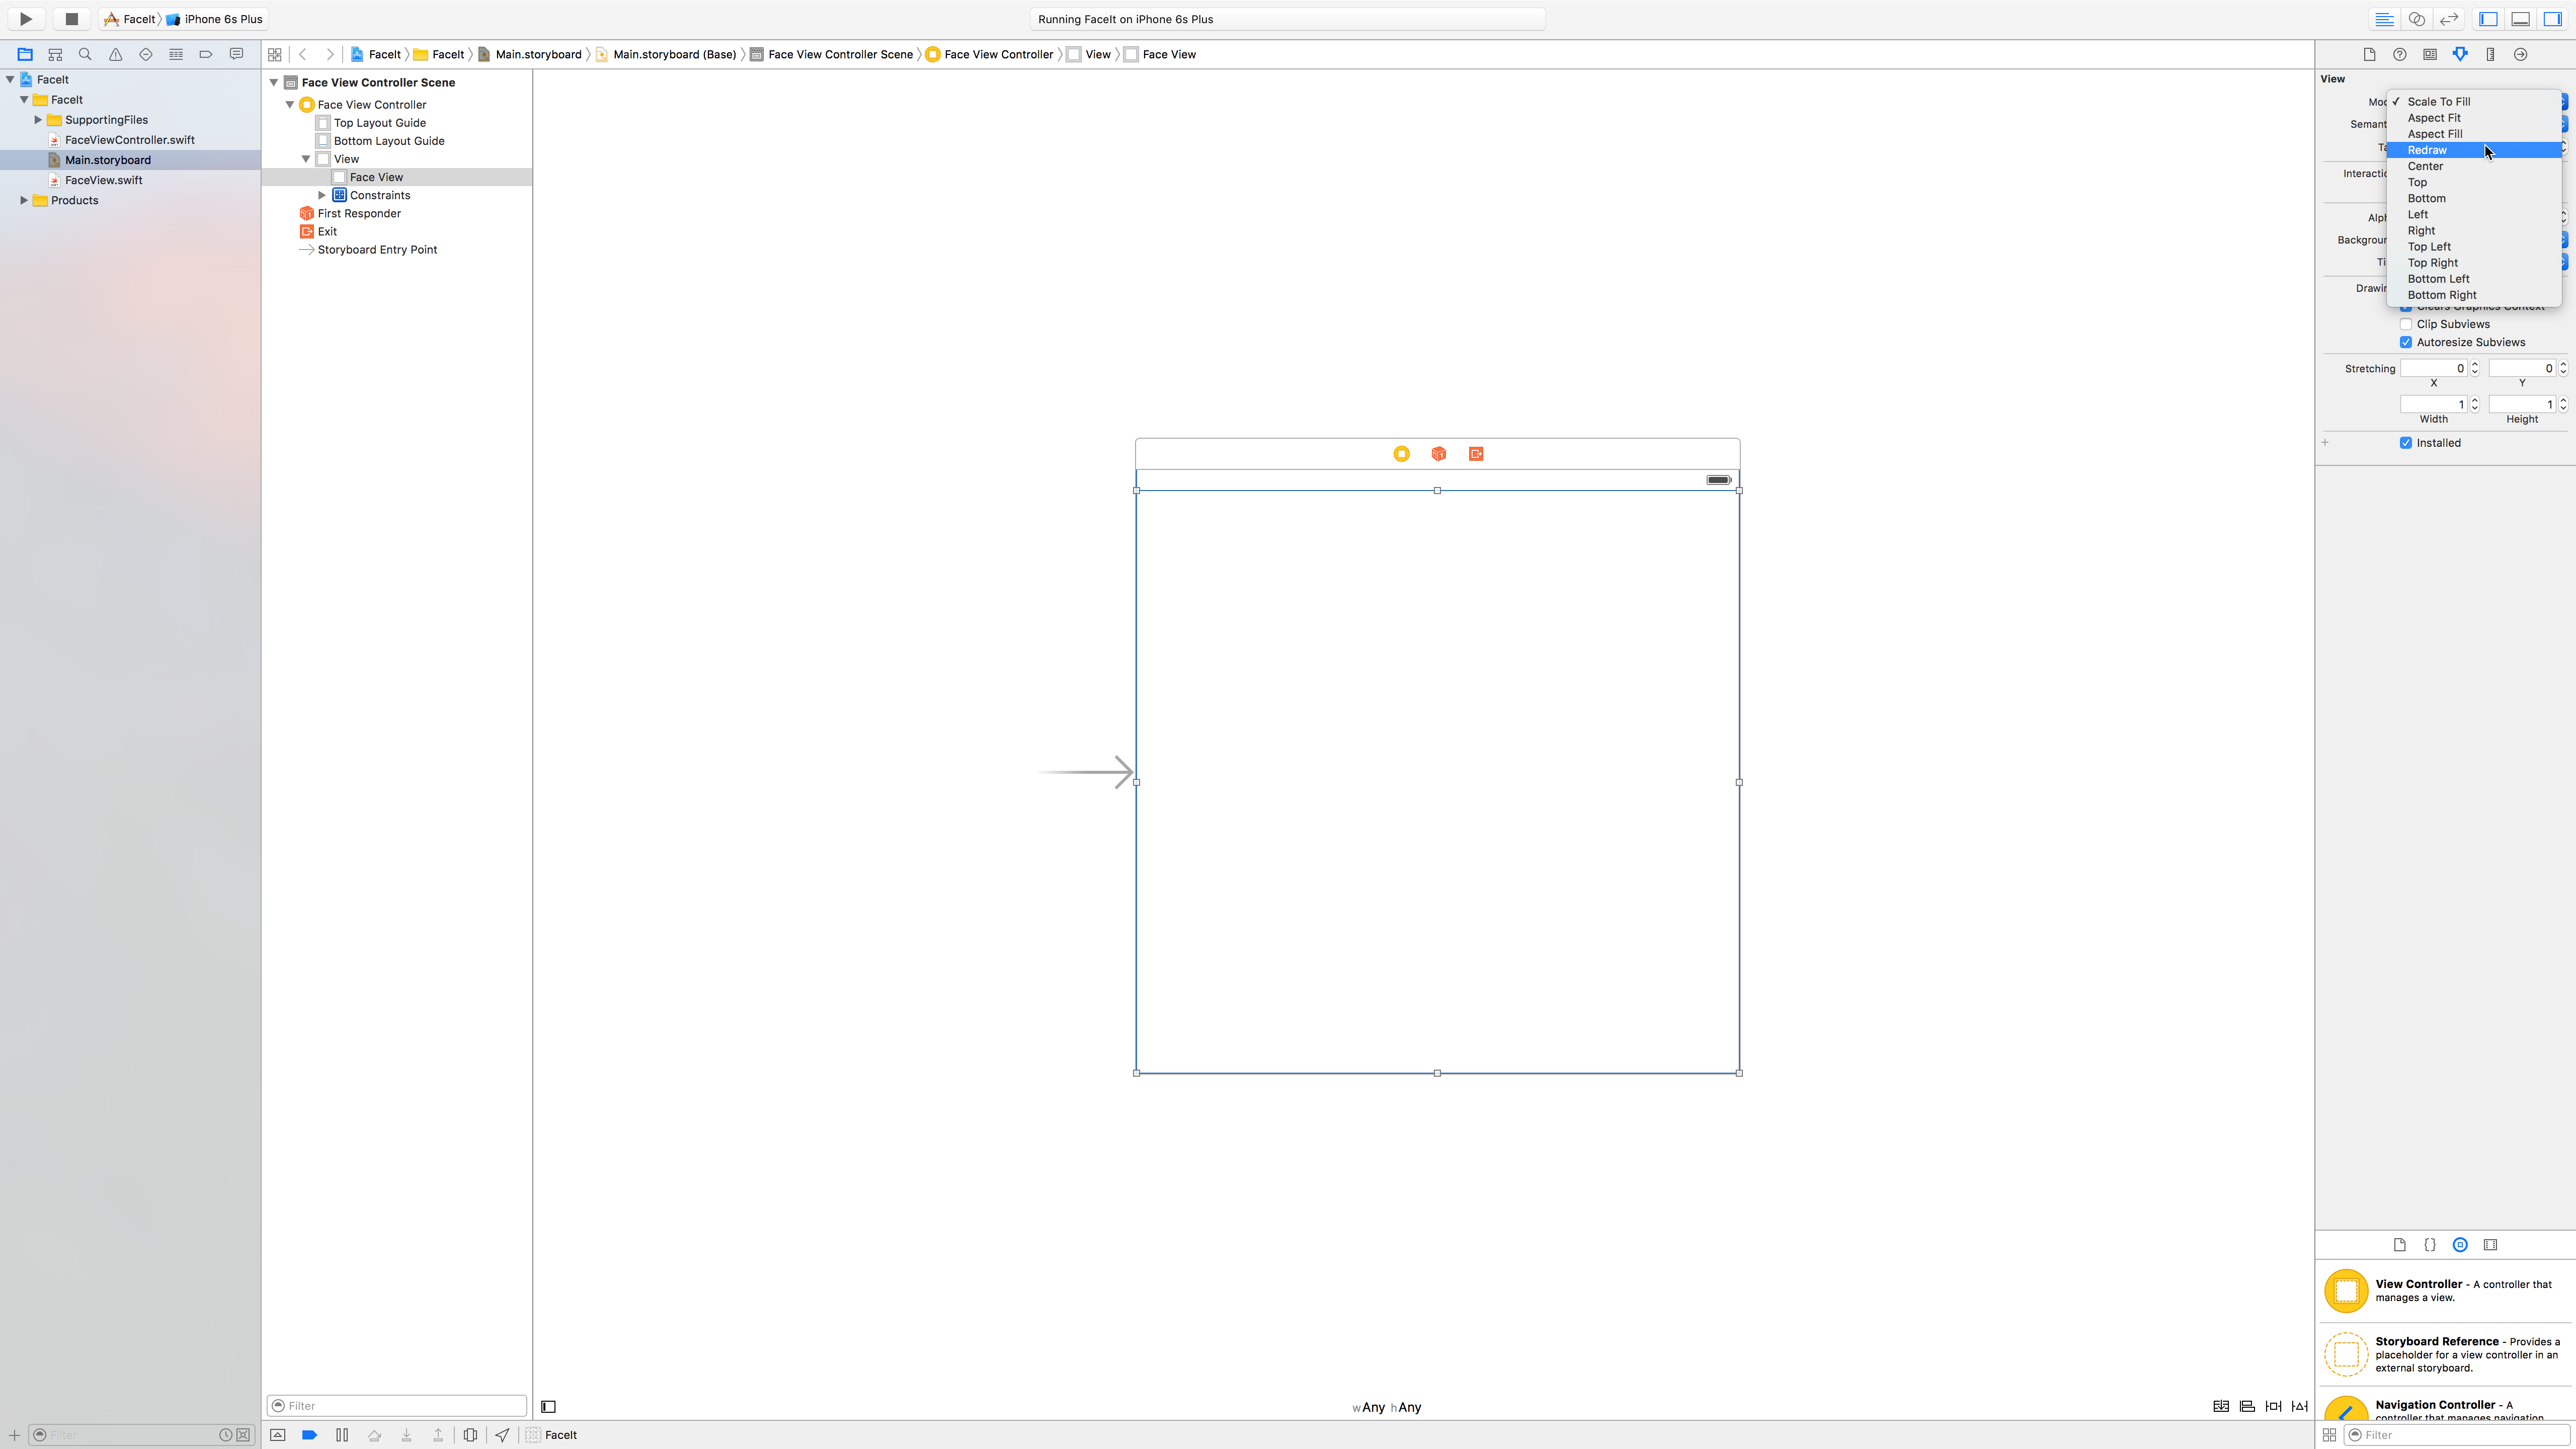 Figure 8: Changing content mode of view.
You can now rerun the application to test that this fixed the issue. At this point, you may have noticed that the face is not appearing in Xcode when viewing the storyboard file. This is because we haven't told Xcode to do this, and we will talk about this next time when we are dealing with multiple MVCs, where it will be necessary to see exactly what each view looks like in the storyboard.
We have got the outline of the face, but now its time to add some other features. However, before we do this it would be wise to create these features with respect to the skull radius and center, and so we should extract this out of the function and make it global. If you give this a go yourself, you may run into an issue seen in Figure 9.
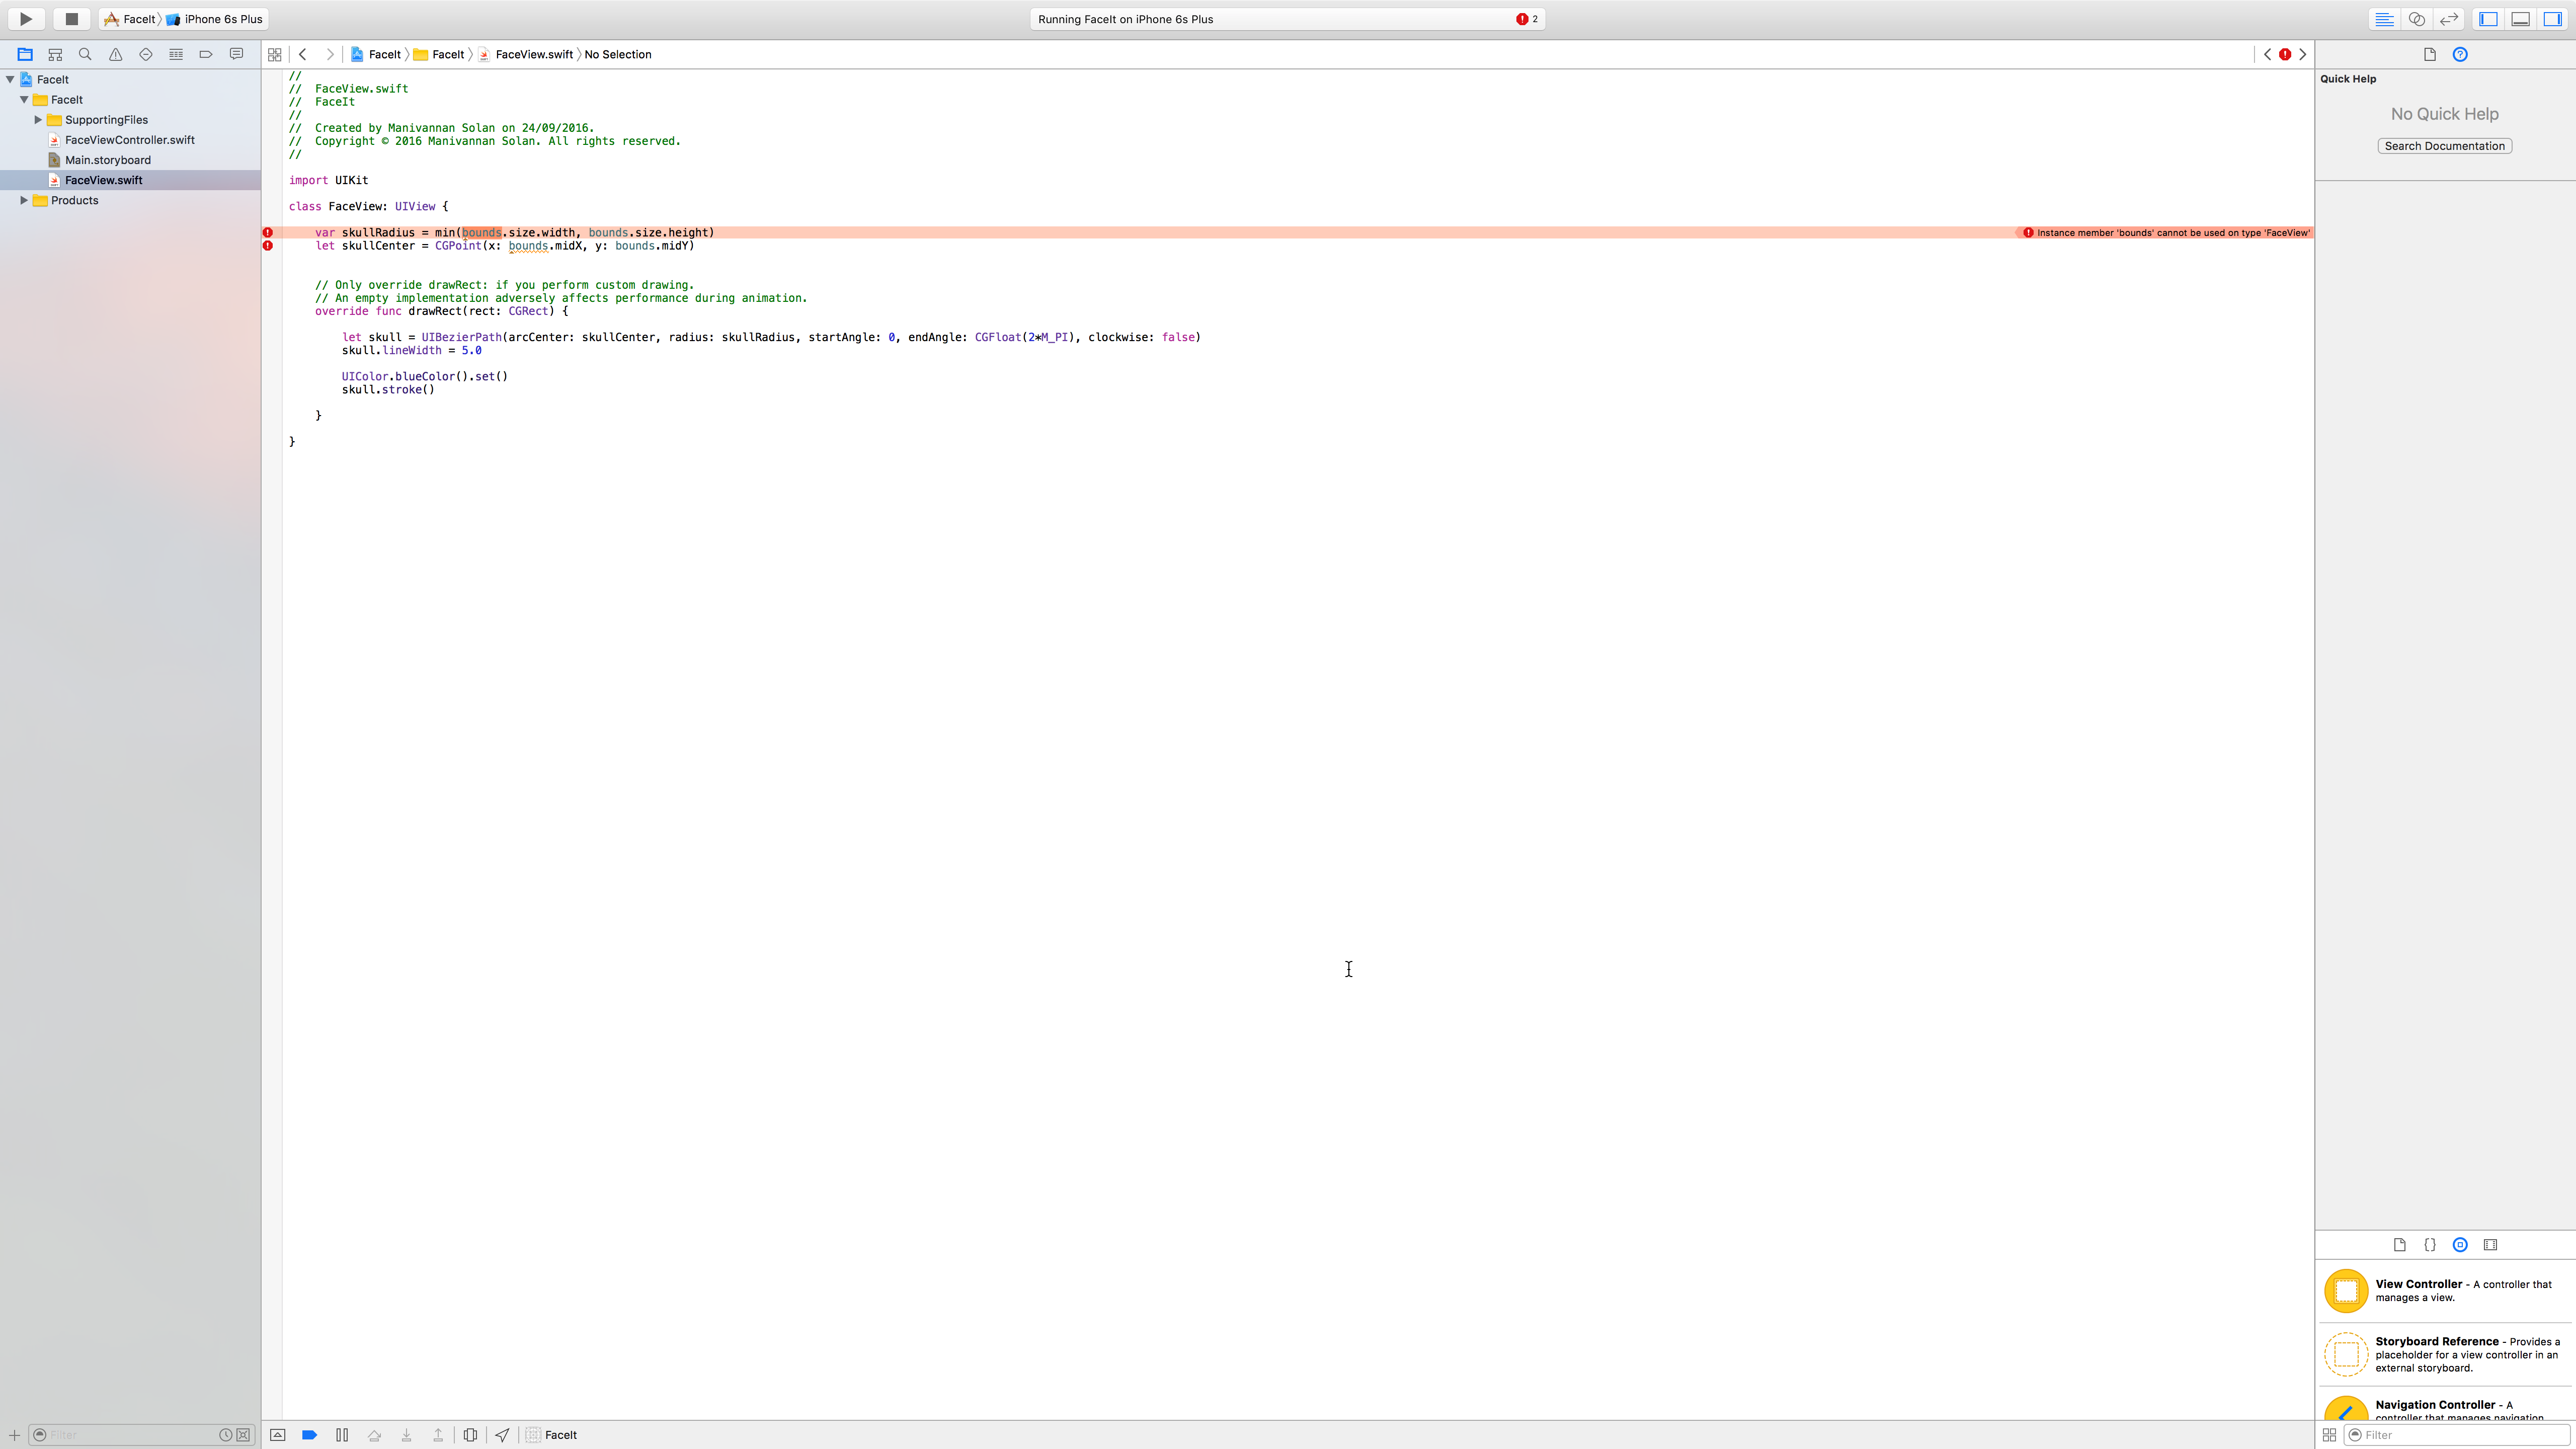 Figure 9: Issue with bounds variable.
The issue here is that you are trying to use the bounds variable during initalisation of the view, when it is not yet available. You can only access the bounds variable after initialisation. Computed properties can help us in this situation. As we are only going to be getting the variable, and not explicitly setting it, we may as well make this a read-only property. Tip: We can get away without putting the 'get { }' in the definition of the property, as long as it's a read-only property. We will also include some ratios to help us with the mathematical calculations for the placements of these face features and an enum to handle the left and right eyes.
var skullRadius: CGFloat {
         return min(bounds.size.width, bounds.size.height)
}

var skullCenter: CGPoint {
        return CGPoint(x: bounds.midX, y: bounds.midY)
}

private struct Ratios {
    static let SkullRadiusToEyeOffset: CGFloat = 3
    static let SkullRadiusToEyeRadius: CGFloat = 10
    static let SkullRadiusToMouthRadius: CGFloat = 1
    static let SkullRadiusToMouthHeight: CGFloat = 3
    static let SkullRadiusToMouthOffset: CGFloat = 3
}

private enum Eye {
    case Left
    case Right
}
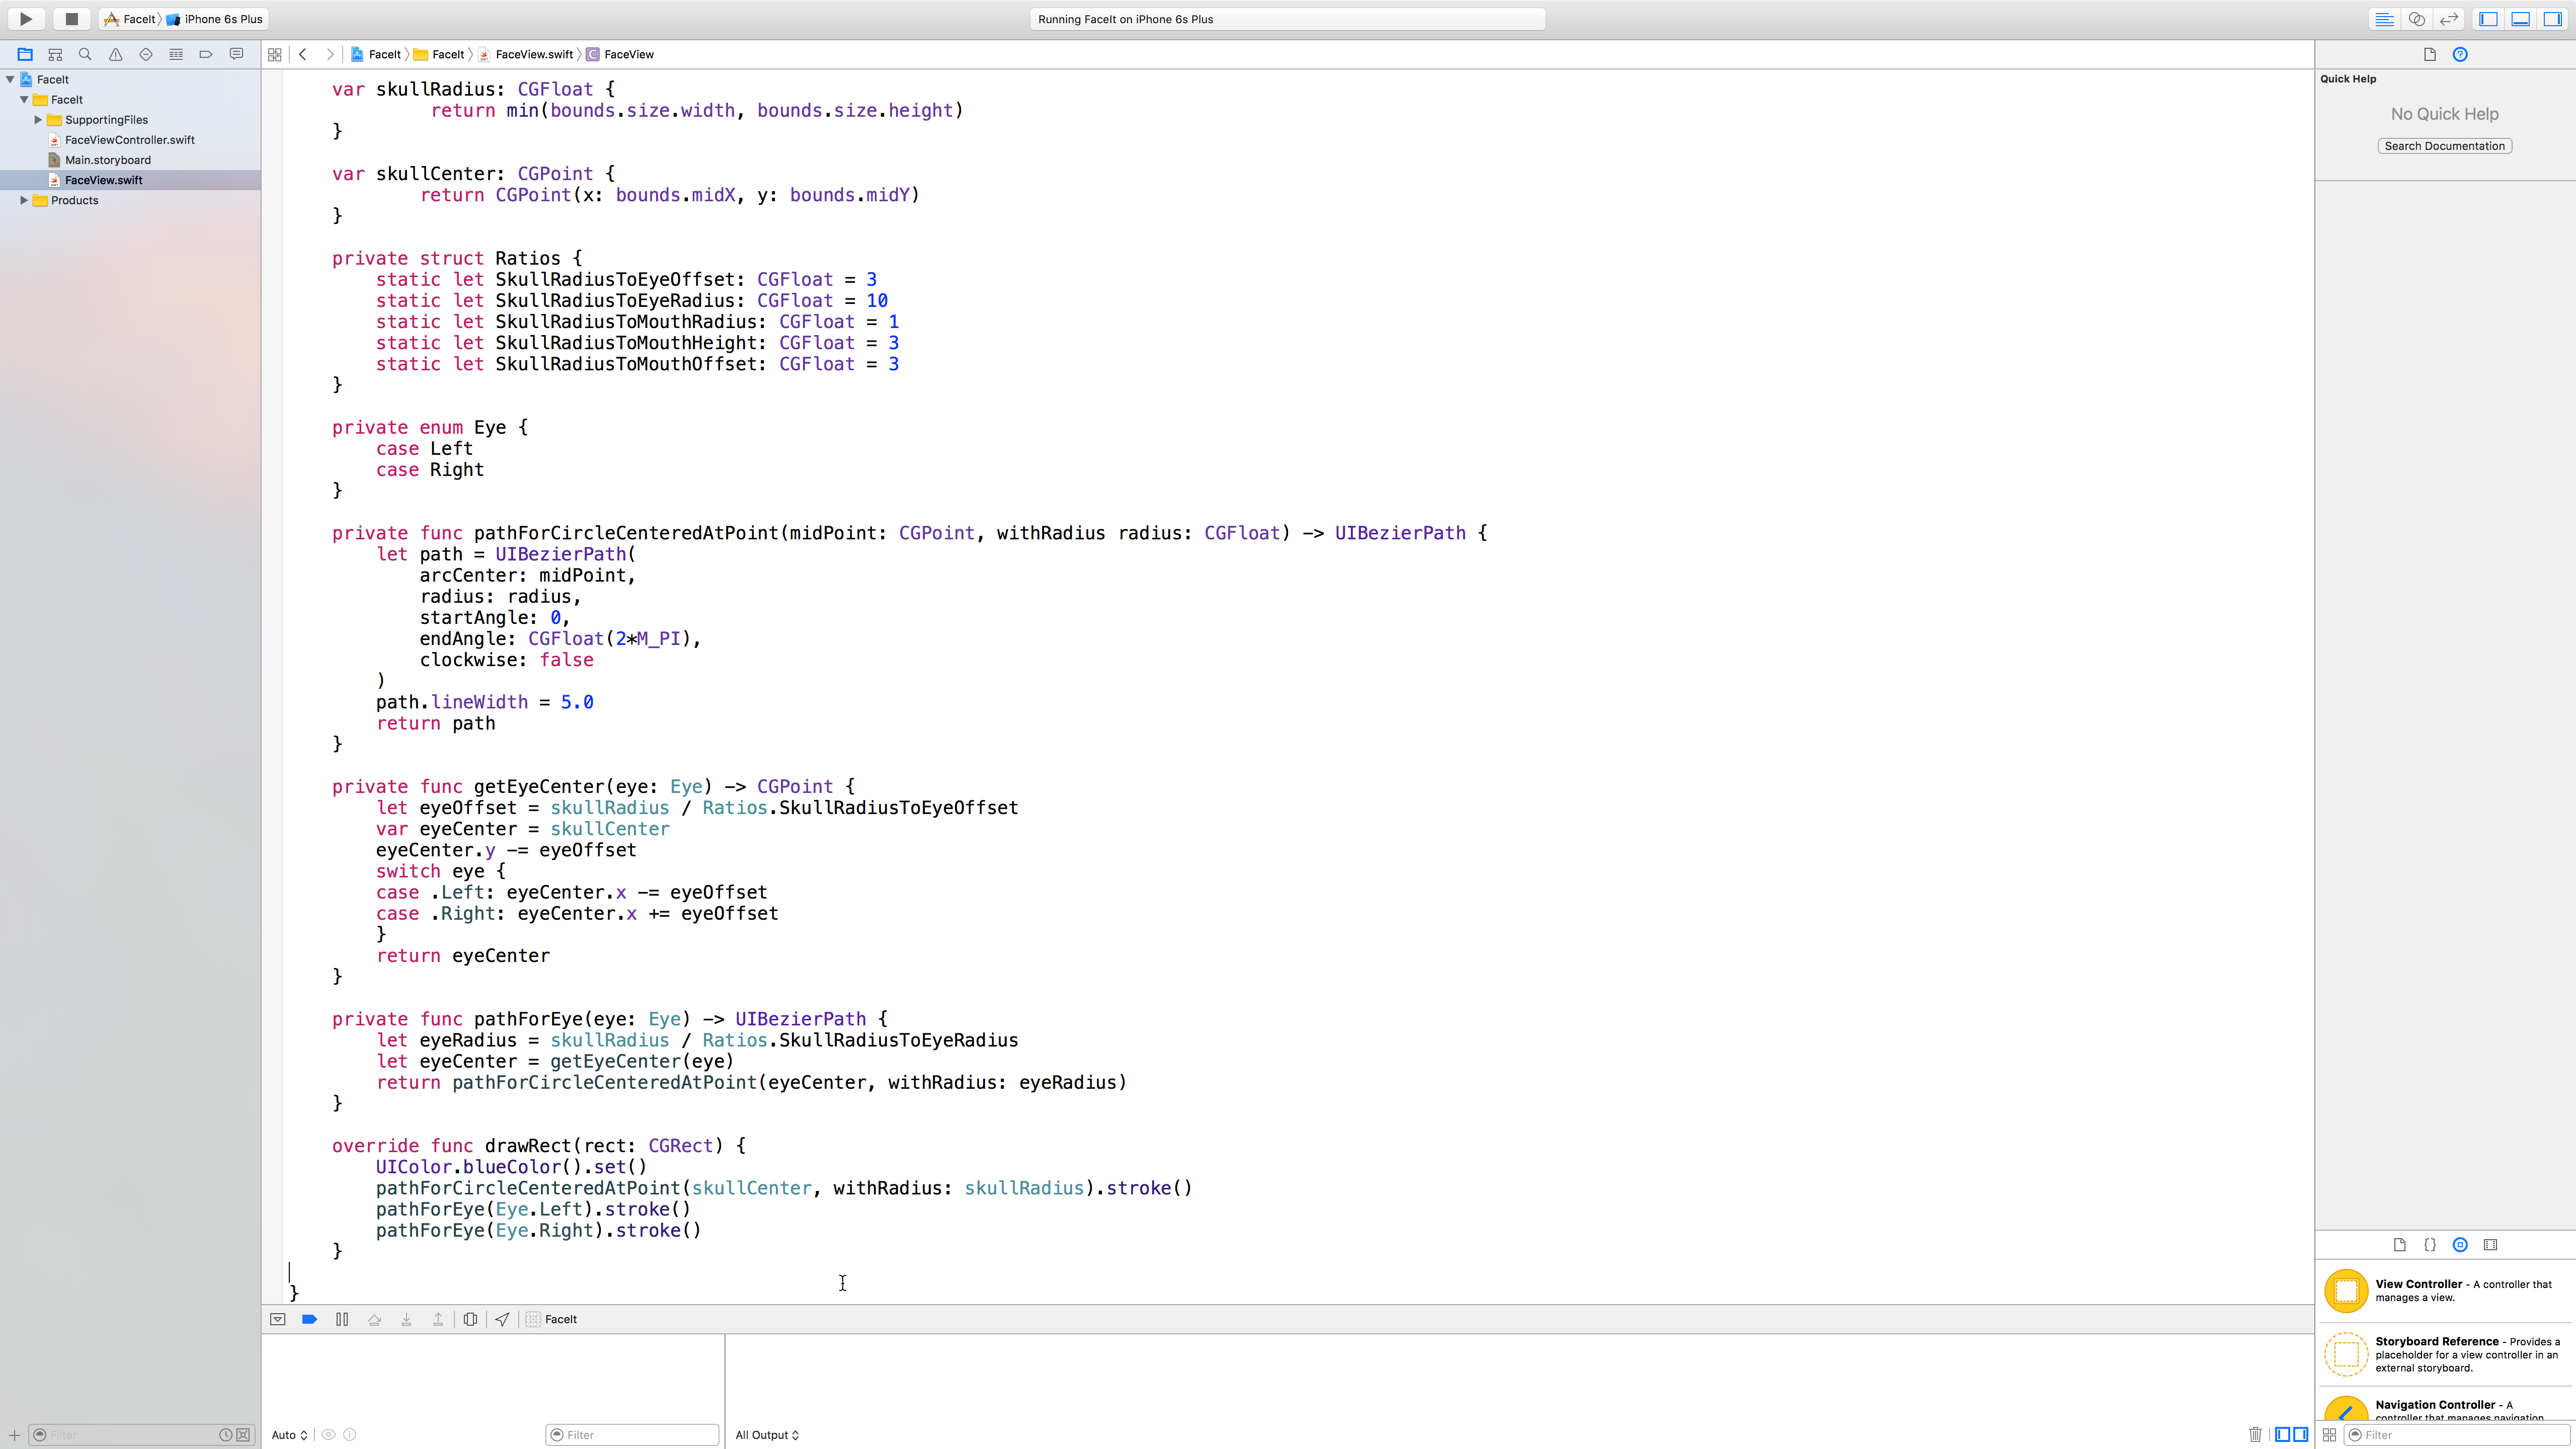
It may have occurred to you that drawing the eye and skull will be similar code as we will just be drawing circles. Therefore, it would be good to have a helper function to handle these cases.
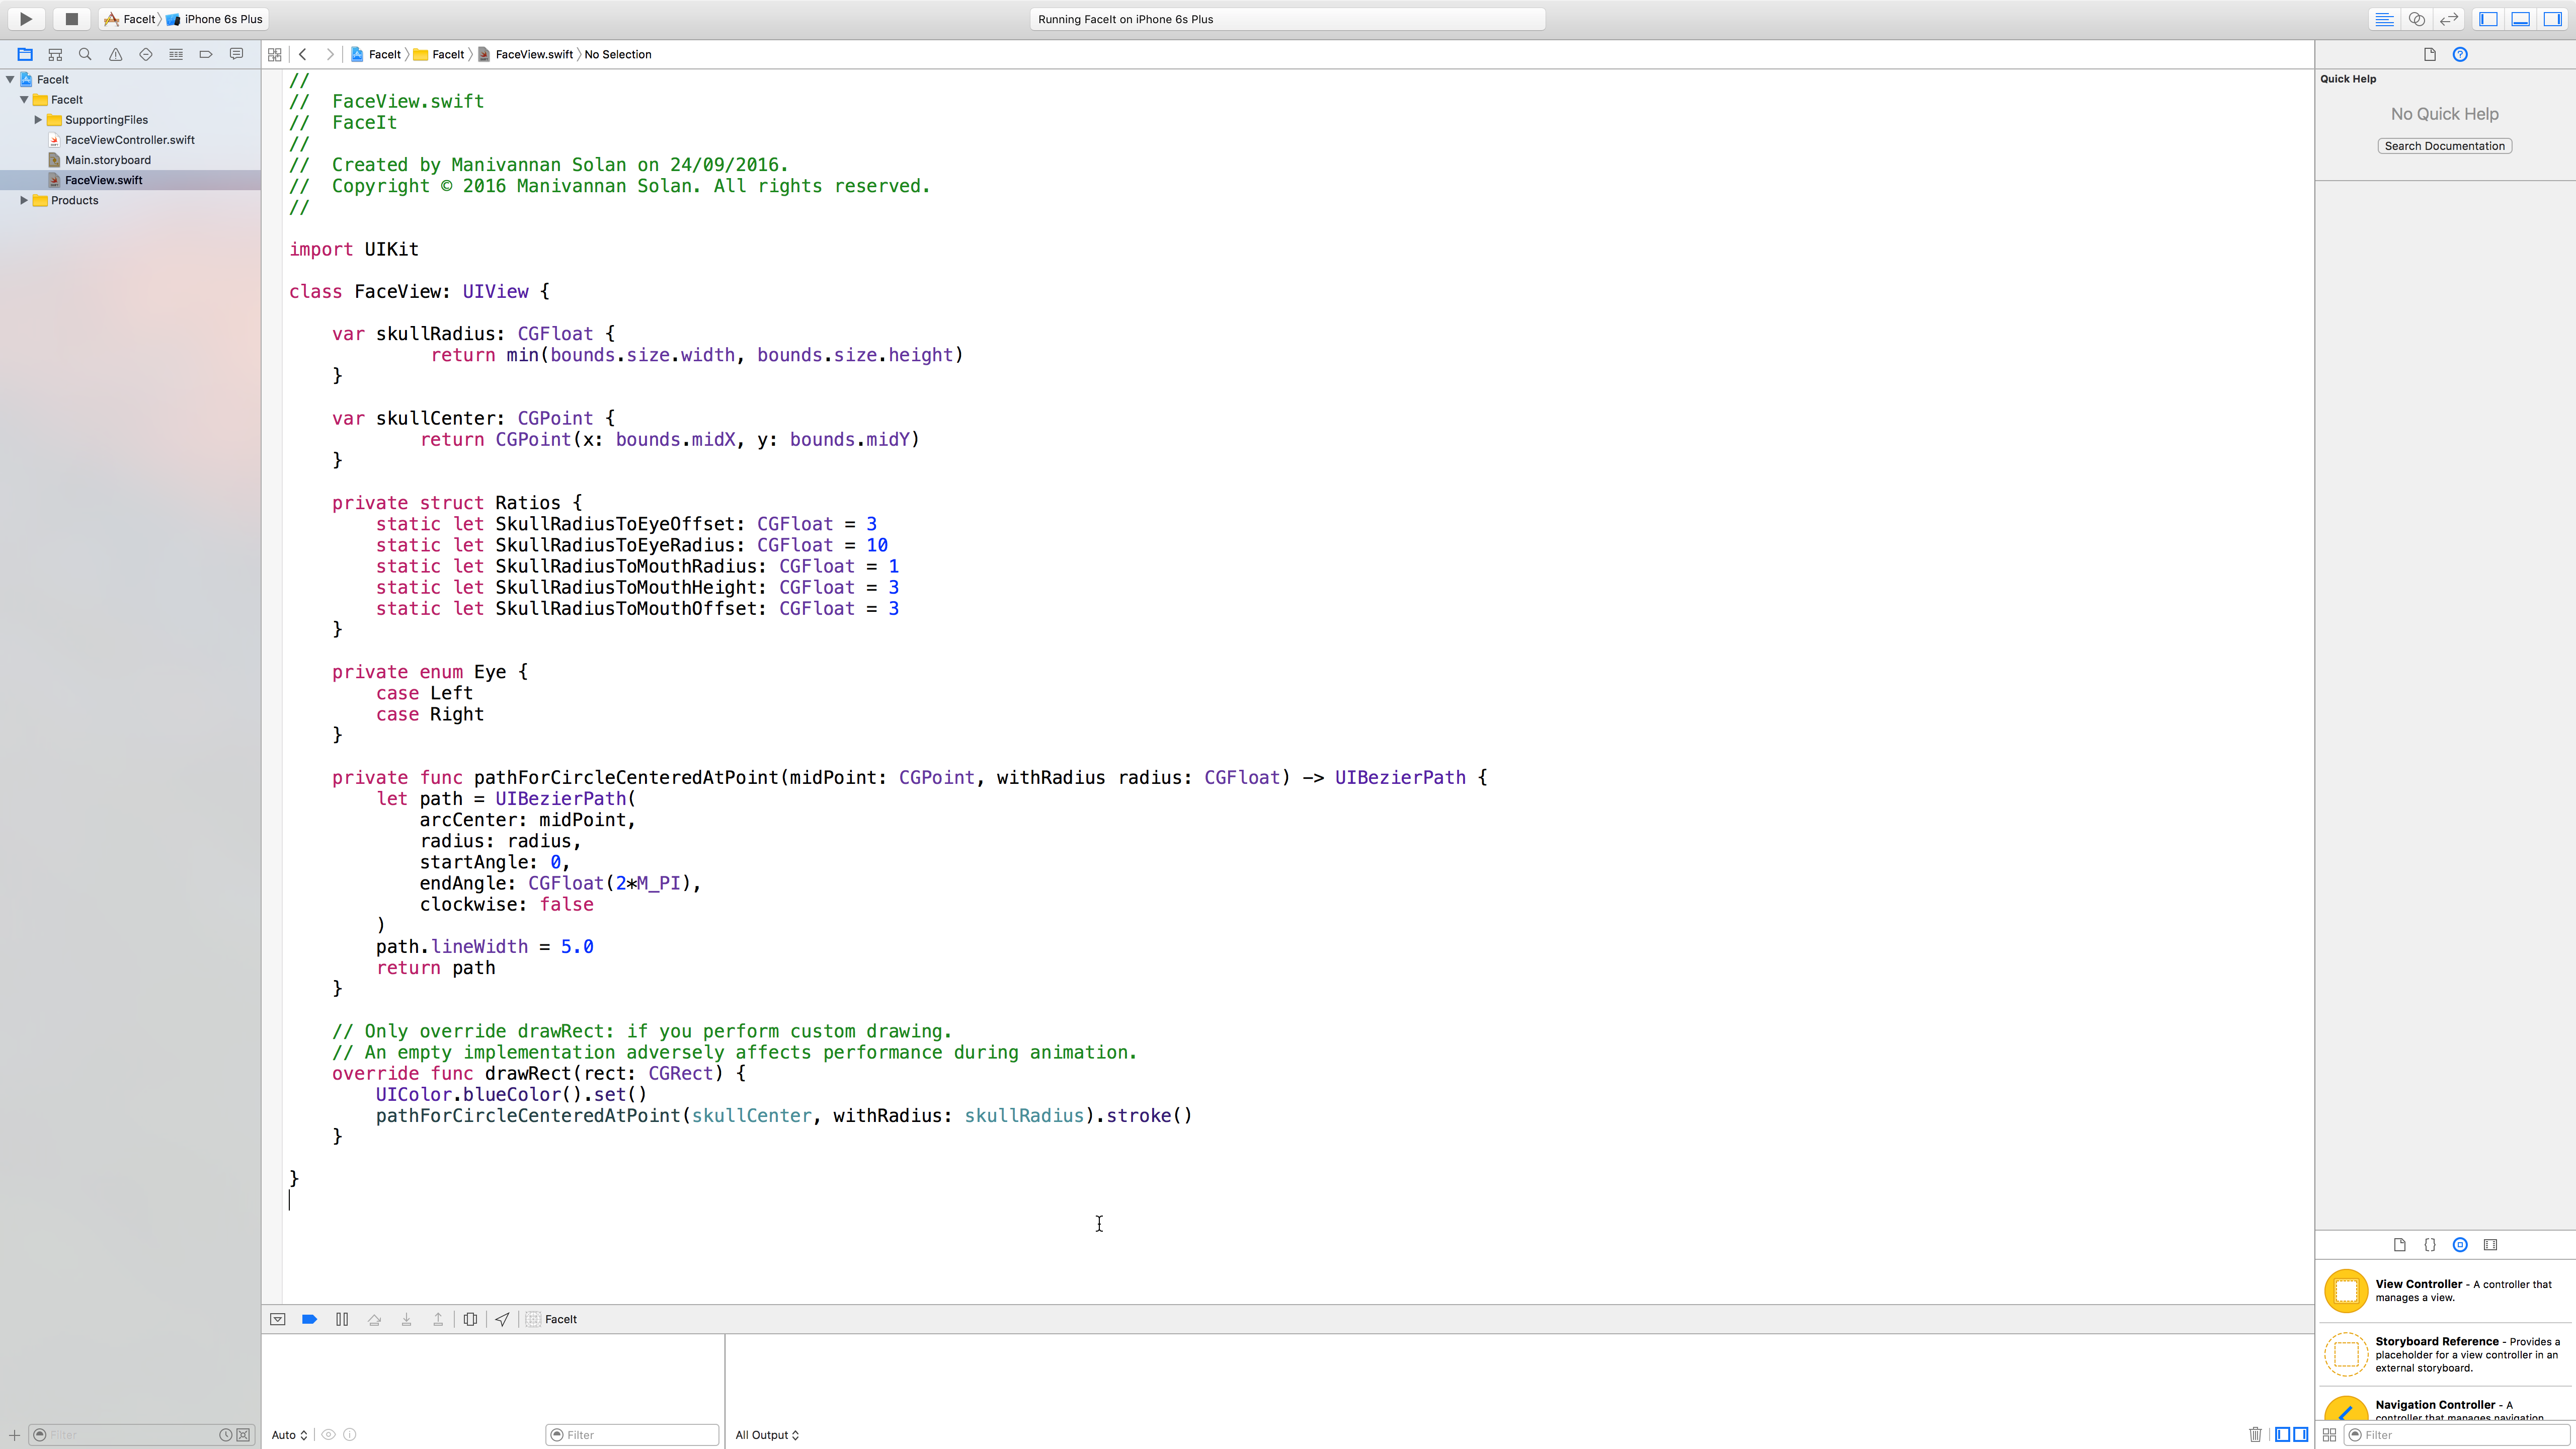 Figure 10: Helper function for drawing circle paths.
There are a few things to note here. We have used internal and external names in this helper function for clarity. Notice how it reads easier when calling the function and also implementing it. This is something that used to frustrate me in other languages, coming up with variable names that would sound good for implementing the method, but won't be helpful when using it - though in most languages when using a function, parameter names aren't really included. Furthermore, we have indented the code for the creation of the UIBezierPath for readability.
Let's finish off the code for the eyes. I know that so far we have been chugging away through this code, but essentially it involves some math that can be calculated once you have an understanding of the coordinate system and drawing, which you should get at the end of this post. Figure 11 provides the updated code for drawing the eyes.
Now would be a good opportunity to rerun the application to check whether the eyes have come out right. If you have been following the code so far, then the eyes may have turned out ok, but the skull is missing - we have a bug. The keen eyed people may have noticed this, but the bug appeared when we factored out the skullRadius and skullCenter code making them global. I forget to divide by two for the skullRadius. Go ahead and do that and then rerun the application to confirm you have a skull and two eyes.
Now for the mouth, we will again create a helper function that will return us a path for the mouth. One thing to note is that we will require a UIBezierCurve as the mouth will have an arc. The way UIBezierCurve works is that it has two control points at which tangents are drawn and the path tries to find a way to join these two tangents in an 'arc-like' fashion.
private func pathForMouth() -> UIBezierPath {
    let mouthWidth = skullRadius / Ratios.SkullRadiusToMouthWidth
    let mouthHeight = skullRadius / Ratios.SkullRadiusToMouthHeight
    let mouthOffset = skullRadius / Ratios.SkullRadiusToMouthOffset

    let mouthRect = CGRect(x: skullCenter.x - mouthWidth / 2, y: skullCenter.y + mouthOffset, width: mouthWidth, height: mouthHeight)

    return UIBezierPath(rect: mouthRect)
}
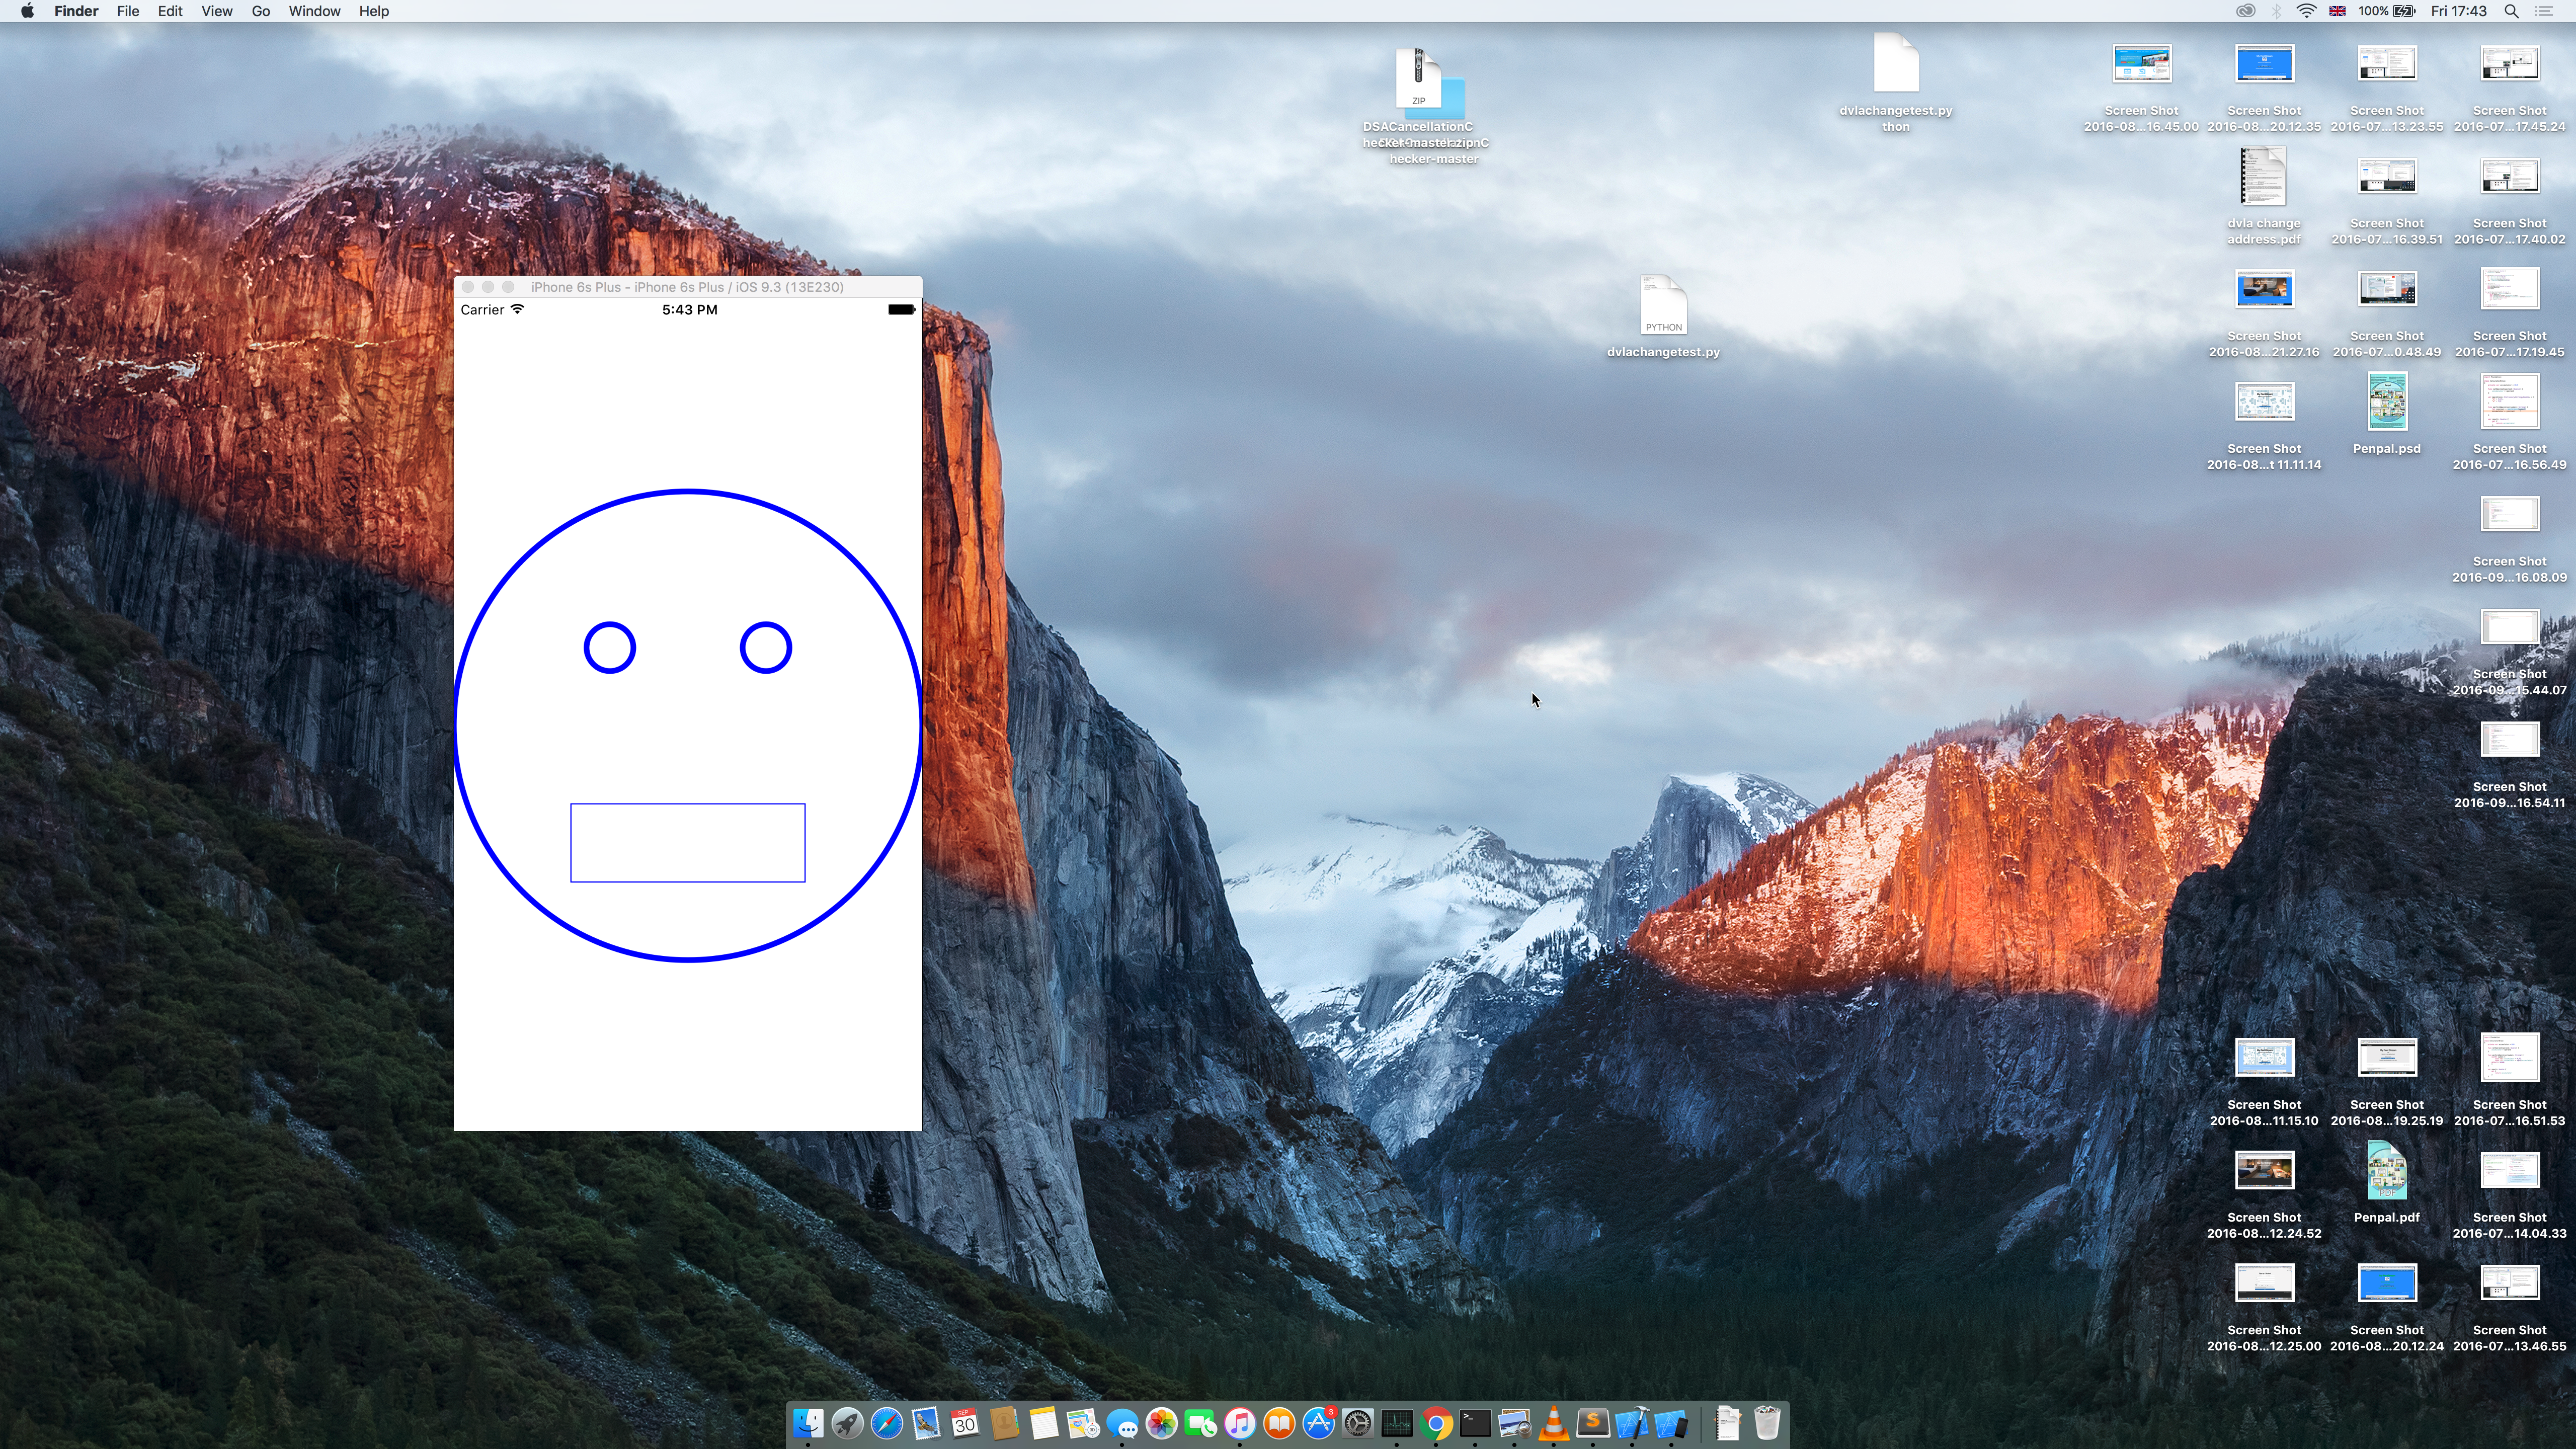
Note: I made a typo in the Ratios struct where I previously declared a SkullRadiusToMouthRadius, which instead should be SkullRadiusToMouthWidth. Now with the function above, and the additional line to create the stroke in the drawRect() method, we should be able to rerun the application and get something like Figure 12. The rectangle will help us when selecting the control points for the curve.
Let's finish off the creation of the mouth. This will require some more math.
private func pathForMouth() -> UIBezierPath {
    let mouthWidth = skullRadius / Ratios.SkullRadiusToMouthWidth
    let mouthHeight = skullRadius / Ratios.SkullRadiusToMouthHeight
    let mouthOffset = skullRadius / Ratios.SkullRadiusToMouthOffset

    let mouthRect = CGRect(x: skullCenter.x - mouthWidth / 2, y: skullCenter.y + mouthOffset, width: mouthWidth, height: mouthHeight)

    let mouthCurvature: Double = 0.0 // 1 full smile, -1 full frown
    let smileOffset = CGFloat(max(-1, min(mouthCurvature, 1))) * mouthRect.height
    let start = CGPoint(x: mouthRect.minX, y: mouthRect.minY)
    let end = CGPoint(x: mouthRect.maxX, y: mouthRect.minY)
    let cp1 = CGPoint(x: mouthRect.minX + mouthRect.width / 3, y: mouthRect.minY + smileOffset)
    let cp2 = CGPoint(x: mouthRect.maxX - mouthRect.width / 3, y: mouthRect.minY + smileOffset)

    let path = UIBezierPath()
    path.moveToPoint(start)
    path.addCurveToPoint(end, controlPoint1: cp1, controlPoint2: cp2)
    path.lineWidth = 5.0

    return path
}
You can now rerun the application and be greeted with a flat mouth face (as long as you've followed everything correctly). We can change the mouth by changing the mouth curvature variable.
In the next episode we will be covering gestures to help modify the face during runtime of the application, instead of having to manually change variables such as the mouth curvature. Thanks for reading!
